Love this? Save it for later!
Share the inspiration with your friends
My roommate asked why I couldn’t just shake the espresso with the brown sugar and oat milk all together in one container. It was a Tuesday afternoon, and I was meticulously layering ingredients into a tall glass—first the brown sugar syrup, then the ice, then the espresso, then a careful pour of oat milk over the back of a spoon to keep the layers distinct. I started to explain why that wouldn’t work—the sugar wouldn’t dissolve properly, the milk would get too foamy, the layers would blur into a muddy mess. Then I stopped. Honestly, I had never actually tried it her way.
So I handed her the mason jar, the ice, the syrup, and the espresso, and watched her dump everything in at once. She put the lid on and shook it like she was trying to win a contest. I braced for disaster. But when she poured it into a glass and handed it to me, I took a sip and just stood there, quiet. It was better than mine. The brown sugar had dissolved completely into the espresso during the shake, creating this perfectly integrated sweetness that I had been chasing for weeks with my careful layering technique. The oat milk had emulsified just enough to make the whole thing creamy without losing that signature coffee-forward punch.
That moment changed how I make iced coffee at home. I mean, I spent months thinking I needed to replicate the exact Starbucks method—the specific shaker, the precise pour order, the whole performance. But my roommate, who barely drinks coffee, figured out in thirty seconds what I had been overcomplicating for months. Maybe you’ve been there too, watching endless TikTok tutorials and buying special equipment, only to realize the best version was the simplest one all along. This cozy copycat Starbucks brown sugar shaken espresso has become my morning ritual, and I keep making it because it reminds me that sometimes the person who knows the least about cooking actually knows exactly what they’re doing.
Why You’ll Love This Recipe
Let me tell you why this recipe has completely taken over my morning routine and probably will do the same to yours. I’ve tested this version at least twenty times over the past few months, tweaking the ratios, trying different oat milks, and even dragging friends over for blind taste tests against the real Starbucks drink. This is the one that won every single time.
- Quick & Easy: Comes together in under five minutes, no fancy equipment required. You don’t even need a proper cocktail shaker—a mason jar works perfectly.
- Simple Ingredients: You probably already have brown sugar in your pantry, and oat milk is easy to find at any grocery store. No need to hunt down obscure syrups or specialty items.
- Perfect for Cozy Mornings: This is the drink you want on a chilly fall morning when you’re curled up under a blanket, or on a lazy Sunday afternoon when you need a little pick-me-up without leaving the house.
- Crowd-Pleaser: I’ve made this for friends who swear they don’t like oat milk, and they ended up asking for the recipe. It’s that good.
- Unbelievably Delicious: The combination of rich espresso, caramel-like brown sugar, and creamy oat milk creates this velvety texture that feels indulgent but isn’t heavy. The shaking aerates everything just enough to give it that signature frothy top without being overly foamy.
What makes this recipe different from the countless other copycat versions out there is the technique. Most recipes tell you to make a separate brown sugar syrup on the stove, or to shake the espresso and sugar first and then add the milk. But my roommate’s accidental method—shaking everything together at once—creates a more integrated, balanced flavor. The oat milk actually helps the sugar dissolve more evenly, and the ice chips that form during shaking add this lovely texture that you don’t get with the layered method. It’s not just another version—it’s the best version, born from someone who didn’t know any better and accidentally stumbled onto perfection.
This recipe is the kind that makes you close your eyes after the first sip. It’s comfort in a glass—warm notes of brown sugar, the familiar bitterness of espresso, and the creamy comfort of oat milk. Perfect for those days when you need a little treat without spending five dollars at the drive-through.
What Ingredients You Will Need
This recipe uses simple, everyday ingredients to deliver that cozy coffee shop experience right in your kitchen. Most of these are probably already in your pantry or fridge, which makes this perfect for those mornings when you’re craving something special but don’t want to make a grocery run.
- 2 tablespoons brown sugar (light or dark both work—dark gives a deeper molasses flavor, light is milder and closer to the Starbucks version)
- 2 shots espresso (about 2 ounces, or 60 ml—you can use a stovetop moka pot, an espresso machine, or even strongly brewed coffee in a pinch)
- 1 cup ice cubes (about 5-6 standard cubes, or enough to fill your glass)
- ¾ cup oat milk (180 ml—I prefer Oatly Barista Edition for the creamiest texture, but any unsweetened oat milk works)
- Pinch of sea salt (optional but highly recommended—it balances the sweetness and enhances the coffee flavor)
- ½ teaspoon vanilla extract (optional—adds a warm, cozy note that complements the brown sugar beautifully)
Ingredient Tips:
- For the brown sugar, I recommend Wholesome Sweeteners brand if you can find it—it has a finer texture that dissolves more easily in cold liquid. If your brown sugar is clumpy, press it through a sieve before measuring.
- Look for oat milk that’s labeled “barista blend” or “original” rather than “low-fat” or “lite.” The higher fat content creates a creamier texture that mimics the Starbucks version perfectly. I’ve tested this with Oatly, Planet Oat, and Chobani oat milks, and they all work well, though Oatly gives the richest result.
- If you don’t have an espresso machine, a Bialetti moka pot makes excellent concentrated coffee that works perfectly in this recipe. I use a 3-cup moka pot, which yields about 4-5 ounces of strong coffee—use 2 ounces and save the rest for another drink.
- For a caffeine-free version, substitute decaf espresso or chicory coffee. The flavor profile changes slightly but it’s still delicious.
- In summer, I sometimes swap the brown sugar for maple syrup or honey for a different sweetness profile. It’s not exactly the same as the Starbucks version, but it’s a lovely variation.
Equipment Needed
One of the best things about this recipe is that you don’t need any special equipment. Here’s what you’ll need:
- Airtight jar or shaker: A 16-ounce mason jar works perfectly. I use a wide-mouth Ball jar that I’ve had for years—the lid seals tightly and the wide opening makes it easy to add ice and clean afterwards. If you have a cocktail shaker, that works too, but I actually prefer the mason jar because you can see the ingredients mixing together.
- Espresso maker or moka pot: I use a Bialetti Venus moka pot that I bought for twenty dollars at a kitchen supply store. It’s lasted me three years so far. If you don’t have one, a French press can make concentrated coffee, or you can use a stovetop percolator.
- Measuring spoons: For the brown sugar and vanilla. A standard set works fine.
- Tall glass: For serving. A 12-16 ounce glass is ideal. I use an old pasta sauce jar that I repurposed—it has this satisfying heft to it.
- Stirring spoon: For mixing if needed. A long iced tea spoon is perfect.
Budget-Friendly Alternatives: If you don’t have a mason jar, any container with a tight-fitting lid works. I’ve used a cleaned-out peanut butter jar and a protein shaker bottle in a pinch. The key is that it seals well so you can shake vigorously without making a mess. Don’t spend money on a fancy shaker—your kitchen probably already has something that works.
Preparation Method

This method is straightforward, but I’ve included all the little details I’ve learned from making this dozens of times. Follow these steps, and you’ll have a drink that rivals anything from the coffee shop.
- Brew your espresso first. Start by brewing 2 ounces (60 ml) of espresso using your preferred method. If you’re using a moka pot, this takes about 3-4 minutes on medium-low heat. The espresso should be hot and fresh—this heat is important because it helps dissolve the brown sugar later. While the espresso is brewing, measure out your other ingredients so everything is ready to go.
- Add brown sugar to your jar. Place 2 tablespoons of brown sugar into your mason jar or shaker. If your brown sugar is hard or clumpy, press it through a small sieve or break it up with your fingers. I learned this the hard way—clumpy sugar doesn’t dissolve evenly and leaves gritty bits at the bottom of your drink. A pinch of sea salt goes in now too, if you’re using it.
- Pour in the hot espresso. As soon as your espresso is ready, pour it directly over the brown sugar. The heat is crucial here—it melts the sugar and creates a syrup-like base. Stir quickly with a spoon to help the sugar dissolve. You should see the mixture turn a deep, caramel color. If there are still sugar crystals at the bottom, stir a bit more before moving to the next step. This takes about 15 seconds.
- Add the oat milk and vanilla. Pour in ¾ cup (180 ml) of oat milk and ½ teaspoon of vanilla extract if you’re using it. Don’t stir yet—just let everything sit together in the jar.
- Add the ice. Drop in about 5-6 ice cubes, or enough to fill the jar about halfway. The ice does double duty here—it chills the drink and also helps create that lovely frothy texture during shaking.
- Seal and shake vigorously. Screw the lid on tightly and shake the jar as hard as you can for about 15-20 seconds. I mean really go for it—this isn’t a gentle swirl. You want the ice to clatter around and create agitation. You’ll hear the sound change as the ingredients combine and the ice starts to break into smaller pieces. When you open the lid, you should see a layer of foam on top and the mixture should look uniform and slightly cloudy.
- Pour into a glass and serve immediately. Pour the shaken mixture into your serving glass. The ice from the shaker will have broken down a bit, so add a few fresh cubes if you want a colder drink. The foam will settle on top, creating that beautiful layered look. Take a picture if you want—it’s genuinely pretty—but don’t wait too long to drink it. The texture is best within the first few minutes.
Troubleshooting Tips:
- If your drink tastes watery, you probably used too much ice or didn’t shake long enough. The shaking should incorporate air and create a creamy texture, not just chill the liquid.
- If the brown sugar didn’t dissolve completely, your espresso wasn’t hot enough when you added it. Next time, brew the espresso and use it immediately while it’s still steaming.
- If the drink is too sweet, reduce the brown sugar to 1½ tablespoons. If it’s not sweet enough, add an extra teaspoon next time.
- If you don’t have a lid for your jar, you can use a small plate or saucer pressed firmly on top, but be careful—this is risky and might make a mess. A real lid is much better.
Cooking Tips & Techniques
After making this drink more times than I care to count, I’ve picked up a few tricks that make a real difference. Let me share what I’ve learned, including some failures that taught me valuable lessons.
The temperature matters more than you think. I used to let my espresso sit for a minute while I got the oat milk out of the fridge, and the sugar never dissolved properly. Now I brew the espresso last, right before I’m ready to assemble everything. The heat from the freshly brewed espresso is what creates that silky brown sugar syrup. If you’re using a moka pot, pour the espresso into the jar as soon as it finishes bubbling up.
Don’t skip the shake. I know it’s tempting to just stir everything together with a spoon, but the shaking is what creates that signature texture. The agitation aerates the oat milk and creates microfoam, similar to what you’d get from a steam wand. I once tried to save time by just stirring, and the result was a flat, separated mess that tasted fine but looked sad. The shake is non-negotiable.
One mistake I made repeatedly: For the first few weeks, I was using too much oat milk. I thought I was being generous, but the drink ended up tasting more like oat milk with a hint of coffee rather than coffee with oat milk. The right ratio is crucial—¾ cup of oat milk to 2 ounces of espresso gives you that perfect balance where the coffee flavor still shines through.
Timing strategy: If you’re making this for a crowd, you can pre-measure the brown sugar and salt into individual jars, then brew the espresso in batches. Each person can add their own hot espresso and shake it themselves. It’s actually kind of fun for brunches—everyone gets to be their own barista.
For consistency: Use the same measuring tools every time. I have a specific 2-ounce shot glass that I use for my espresso, and a ¾-cup measuring cup for the oat milk. When I eyeball it, the results are never as good. Measuring might feel fussy, but it’s the difference between a drink that’s just okay and one that makes you close your eyes in satisfaction.
Variations & Adaptations
One of the best things about this recipe is how adaptable it is. Here are some variations I’ve tried and loved:
Dairy-Free Delight: This recipe is already dairy-free if you use oat milk, but you can experiment with other plant-based milks. Almond milk creates a thinner, nuttier drink that’s still delicious but less creamy. Cashew milk is closer to oat milk in texture. Coconut milk (from a carton, not a can) adds a subtle tropical note that pairs surprisingly well with the brown sugar. I personally prefer oat milk for its neutral flavor and creamy texture, but my friend swears by macadamia nut milk.
Seasonal Twist: In fall, add ¼ teaspoon of pumpkin pie spice to the brown sugar before shaking. The warm spices—cinnamon, nutmeg, ginger, and cloves—blend beautifully with the espresso and oat milk. In winter, try adding a drop of peppermint extract along with the vanilla. In summer, muddle a few fresh mint leaves in the bottom of the jar before adding the other ingredients. I did this last July and it was incredibly refreshing.
Extra Indulgent Version: For days when you need a real treat, add a tablespoon of heavy cream or coconut cream along with the oat milk. This creates an even richer, more decadent texture that’s almost like a latte. I reserve this version for Sunday mornings when I have nowhere to be and nothing to do but enjoy my coffee.
Lower Sugar Option: If you’re watching your sugar intake, you can reduce the brown sugar to 1 tablespoon or substitute a sugar-free brown sugar alternative. I’ve tried this with Swerve Brown Sugar Substitute, and while it’s not exactly the same, it’s surprisingly good. The texture is a bit thinner, but the flavor is close enough to satisfy the craving.
Iced or Hot: This recipe is designed for iced coffee, but you can make a hot version by skipping the ice and shaking the espresso, brown sugar, and oat milk together while everything is warm. Pour it into a mug and enjoy immediately. The hot version is less frothy but has a more intense coffee flavor that’s perfect for cold mornings.
Serving & Storage Suggestions
This drink is best enjoyed immediately after making it—the texture and temperature are perfect right after shaking. But here are some tips for serving and storing:
Serving Temperature: Serve immediately over fresh ice. The ice from the shaker will have broken down slightly, so adding a few fresh cubes keeps the drink cold without diluting it too quickly. I like to use large ice cubes or ice spheres because they melt more slowly.
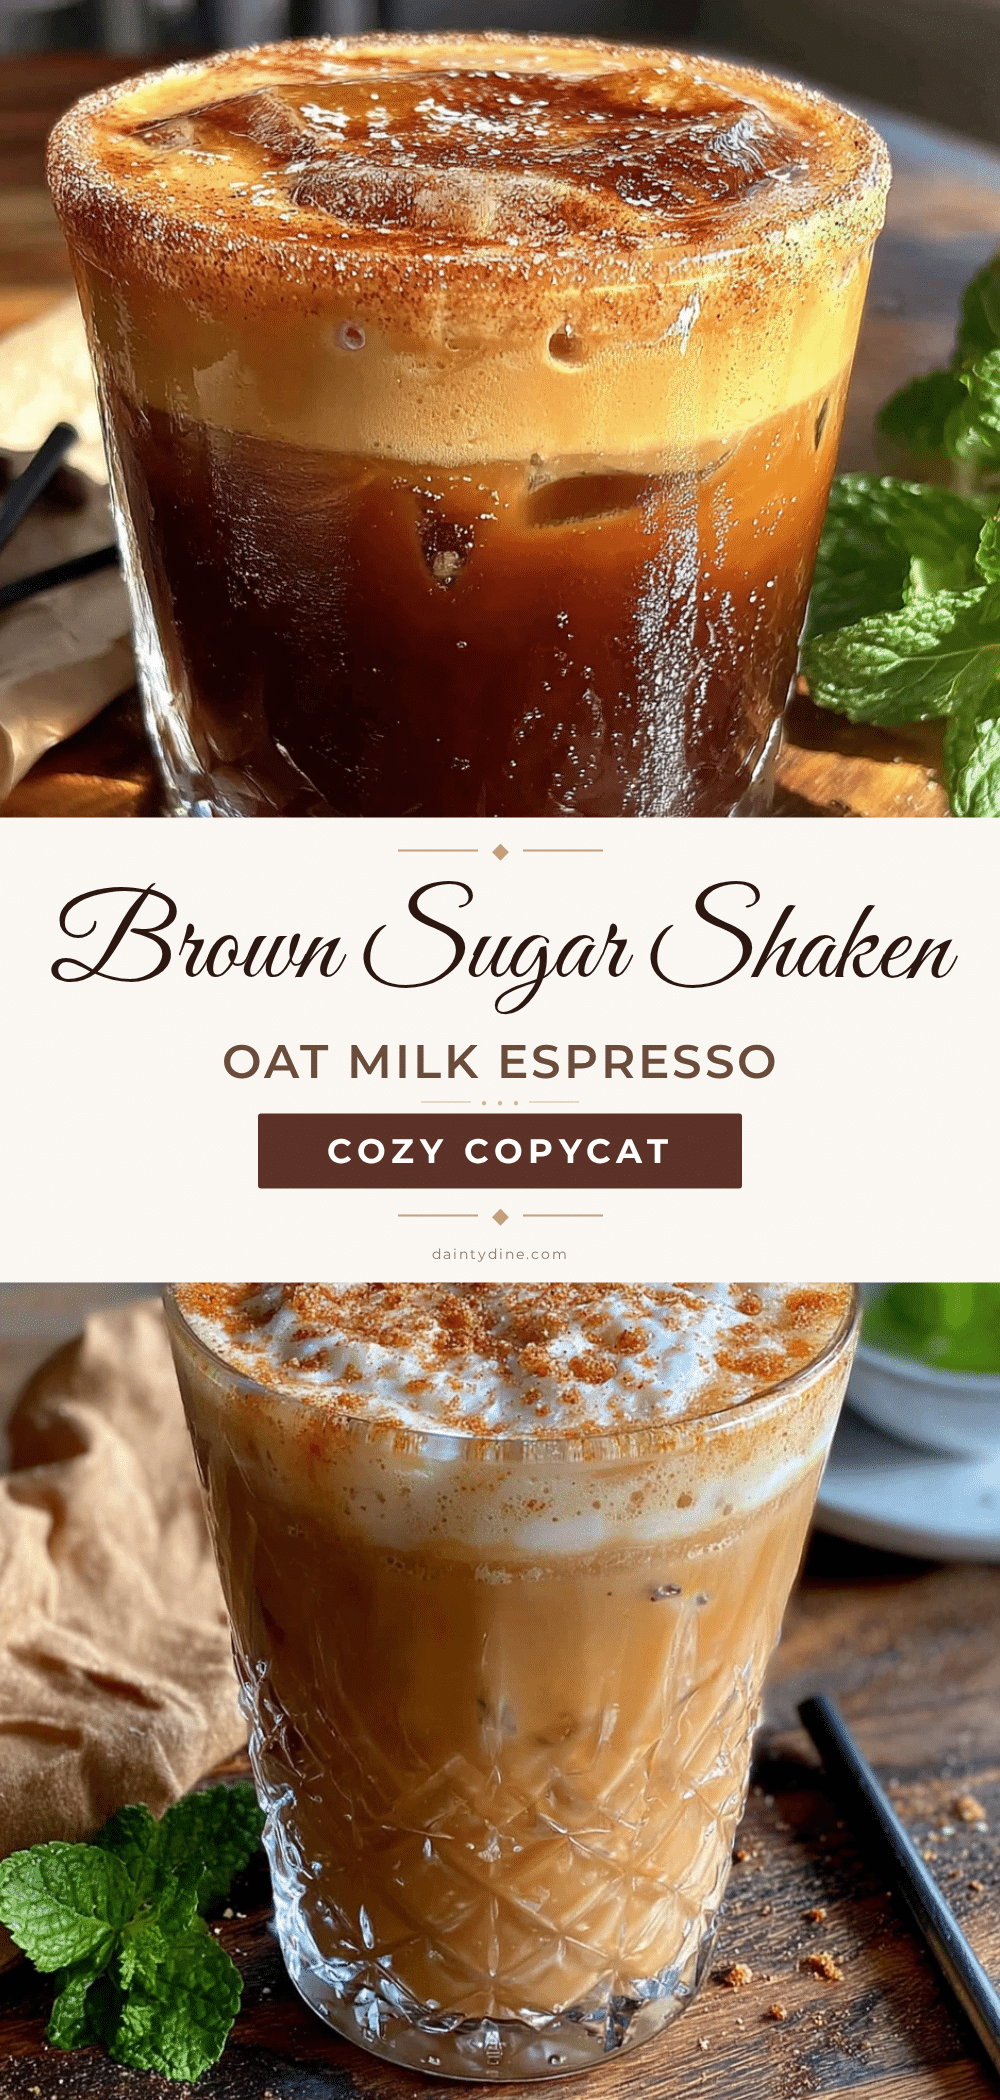
Presentation: Pour the shaken drink into a clear glass to show off the beautiful layers—the dark espresso at the bottom, the creamy oat milk swirling through, and the frothy foam on top. A sprinkle of cinnamon or a dusting of cocoa powder on top makes it look extra special. If you’re serving this to guests, add a cinnamon stick or a strip of orange peel for a fancy touch.
Complementary Pairings: This drink pairs beautifully with something sweet and buttery—think a warm croissant, a slice of banana bread, or a simple butter cookie. The richness of the pastry balances the slight bitterness of the espresso. For a savory option, try it with a breakfast sandwich or a slice of quiche. The creamy oat milk cuts through the saltiness of eggs and cheese perfectly.
Storage: Honestly, this drink doesn’t store well. The texture changes as the ice melts and the foam settles. If you absolutely must make it ahead, prepare the brown sugar syrup separately (dissolve the brown sugar in a small amount of hot water) and store it in the fridge for up to a week. When you’re ready to drink, just combine the syrup with fresh espresso, oat milk, and ice, and shake. This is actually a great meal prep trick—I make a batch of syrup on Sunday and have quick coffee all week.
Reheating: If you make the drink and it gets too watery from melted ice, you can’t really fix it. But if you want to turn leftovers into a hot drink, pour the mixture into a small saucepan and heat it gently over medium-low heat, stirring occasionally. Don’t let it boil—it will separate and become grainy. The hot version won’t have the same frothy texture, but it’s still comforting and delicious.
Flavor Development: Unlike some coffee drinks that taste better after sitting for a while, this one is best fresh. The flavors are bright and balanced immediately after shaking. If it sits for more than 10-15 minutes, the ice dilutes the drink and the foam collapses. So drink up and enjoy it at its peak!
Nutritional Information & Benefits
Here’s the estimated nutritional breakdown for one serving of this cozy copycat Starbucks brown sugar shaken espresso, made with 2 tablespoons brown sugar and ¾ cup oat milk:
| Nutrient | Amount |
|---|---|
| Calories | 180-200 |
| Total Fat | 4-5g |
| Saturated Fat | 0.5g |
| Carbohydrates | 34-38g |
| Sugar | 24-28g |
| Fiber | 1-2g |
| Protein | 3-4g |
| Caffeine | 120-150mg |
Health Benefits: Oat milk is naturally high in beta-glucans, a type of soluble fiber that supports heart health and helps maintain stable blood sugar levels. It’s also often fortified with calcium, vitamin D, and vitamin B12, making it a nutritious choice for those avoiding dairy. The brown sugar provides a quick source of energy, though I recommend enjoying this drink as an occasional treat rather than an everyday staple if you’re watching your sugar intake.
Dietary Considerations: This recipe is naturally dairy-free, vegan, and nut-free (depending on the oat milk brand). It contains no gluten, though some oat milks may be processed in facilities that handle wheat—check the label if you have celiac disease. The drink is also soy-free if you choose a soy-free oat milk brand.
Potential Allergens: Oat milk can be problematic for some people with gluten sensitivities, as oats are sometimes cross-contaminated with wheat. Look for certified gluten-free oat milk if this is a concern. The recipe itself contains no common allergens beyond oats, but always check your specific ingredient labels.
My Personal Perspective: I love that this recipe lets me enjoy a coffee shop experience at home without the added preservatives and stabilizers that commercial versions often contain. It’s a treat, but it’s a treat I can feel good about—made with real ingredients that I recognize and control.
Conclusion
This cozy copycat Starbucks brown sugar shaken espresso has become more than just a recipe in my kitchen—it’s a reminder that sometimes the best discoveries come from letting go of control and trying something unexpected. My roommate’s unconventional method taught me that I don’t need to follow every rule perfectly, and that a little chaos can lead to something genuinely delicious.
I hope you give this recipe a try, and I hope you make it your own. Maybe you’ll add a splash of cinnamon, or swap the oat milk for something else, or discover your own accidental improvement. That’s the beauty of cooking—it’s always evolving, always open to interpretation. Don’t be afraid to experiment and find what works for you.
If you make this drink, I’d love to hear about it. Leave a comment below and tell me how it turned out, or share your own twist on the recipe. Did you try it with a different milk? Did you add a secret ingredient? I’m genuinely curious. And if you have your own story about being proven wrong in the kitchen, I’d love to hear that too. Sometimes the best recipes come from the most unexpected places.
So go ahead—grab your jar, your brown sugar, your espresso, and give it a shake. You might just surprise yourself with what you create. Happy brewing!
Frequently Asked Questions
Can I use regular milk instead of oat milk?
Yes, absolutely. Whole milk or 2% milk will create a creamier, richer drink. The flavor will be slightly different—less nutty and more dairy-forward—but it’s still delicious. If you’re using skim milk, the texture will be thinner and less frothy. I’ve made this with whole milk when I ran out of oat milk, and it was lovely in its own way.
How do I make this drink less sweet?
Reduce the brown sugar to 1 tablespoon or even 1½ teaspoons. You can also try using a sugar substitute like stevia or monk fruit sweetener. Another option is to use unsweetened oat milk, which cuts down on sugar without sacrificing creaminess. I’ve found that the sweetness level is really personal, so adjust until it tastes right to you.
Can I make this without an espresso machine?
Definitely. A moka pot is my preferred alternative—it makes a strong, concentrated coffee that works perfectly. You can also use a French press with a higher coffee-to-water ratio, or even strongly brewed drip coffee. Just make sure the coffee is hot when you add it to the brown sugar so it dissolves properly. Cold coffee won’t work the same way.
Why is my drink watery?
This usually happens for one of two reasons: either you used too much ice, or you didn’t shake it enough. The shaking incorporates air and creates a creamy texture that prevents the drink from feeling thin. If you’re using a lot of ice, try reducing it to 4-5 cubes. Also, make sure you’re shaking vigorously for the full 15-20 seconds—a gentle shake won’t create the same emulsion.
Can I make a big batch for a party?
Yes, but with some adjustments. Make a concentrated brown sugar syrup by dissolving ½ cup brown sugar in ½ cup hot water. Let it cool, then store it in the fridge. When you’re ready to serve, combine 2 tablespoons of syrup with 2 ounces of espresso and ¾ cup oat milk per serving, then shake individually. The syrup keeps for about a week in the refrigerator. I wouldn’t recommend pre-shaking a large batch because the texture changes as it sits.
Pin This Recipe!
Easy Copycat Starbucks Brown Sugar Shaken Espresso

A quick and easy copycat recipe for Starbucks’ Brown Sugar Shaken Espresso, made with simple ingredients and a surprisingly simple technique that creates a perfectly integrated, creamy, and delicious iced coffee at home.
- Prep Time: 5 minutes
- Cook Time: 0 minutes
- Total Time: 5 minutes
- Yield: 1 serving 1x
- Category: Beverages
- Cuisine: American
Ingredients
- 2 tablespoons brown sugar (light or dark)
- 2 shots espresso (about 2 ounces or 60 ml)
- 1 cup ice cubes (about 5–6 standard cubes)
- ¾ cup oat milk (180 ml, preferably barista blend)
- Pinch of sea salt (optional)
- ½ teaspoon vanilla extract (optional)
Instructions
- Brew your espresso first. Start by brewing 2 ounces (60 ml) of espresso using your preferred method. If you’re using a moka pot, this takes about 3-4 minutes on medium-low heat. The espresso should be hot and fresh—this heat is important because it helps dissolve the brown sugar later. While the espresso is brewing, measure out your other ingredients so everything is ready to go.
- Add brown sugar to your jar. Place 2 tablespoons of brown sugar into your mason jar or shaker. If your brown sugar is hard or clumpy, press it through a small sieve or break it up with your fingers. A pinch of sea salt goes in now too, if you’re using it.
- Pour in the hot espresso. As soon as your espresso is ready, pour it directly over the brown sugar. The heat is crucial here—it melts the sugar and creates a syrup-like base. Stir quickly with a spoon to help the sugar dissolve. You should see the mixture turn a deep, caramel color. If there are still sugar crystals at the bottom, stir a bit more before moving to the next step. This takes about 15 seconds.
- Add the oat milk and vanilla. Pour in ¾ cup (180 ml) of oat milk and ½ teaspoon of vanilla extract if you’re using it. Don’t stir yet—just let everything sit together in the jar.
- Add the ice. Drop in about 5-6 ice cubes, or enough to fill the jar about halfway. The ice does double duty here—it chills the drink and also helps create that lovely frothy texture during shaking.
- Seal and shake vigorously. Screw the lid on tightly and shake the jar as hard as you can for about 15-20 seconds. I mean really go for it—this isn’t a gentle swirl. You want the ice to clatter around and create agitation. You’ll hear the sound change as the ingredients combine and the ice starts to break into smaller pieces. When you open the lid, you should see a layer of foam on top and the mixture should look uniform and slightly cloudy.
- Pour into a glass and serve immediately. Pour the shaken mixture into your serving glass. The ice from the shaker will have broken down a bit, so add a few fresh cubes if you want a colder drink. The foam will settle on top, creating that beautiful layered look. Take a picture if you want—it’s genuinely pretty—but don’t wait too long to drink it. The texture is best within the first few minutes.
Notes
The key to this recipe is shaking everything together at once—the hot espresso helps dissolve the brown sugar, and the oat milk emulsifies during shaking for a creamy texture. For best results, use freshly brewed hot espresso and shake vigorously for 15-20 seconds. If the drink tastes watery, you may have used too much ice or not shaken enough. For a less sweet version, reduce brown sugar to 1½ tablespoons. The drink is best enjoyed immediately.
Nutrition
- Serving Size: 1 serving (about 12-
- Calories: 180200
- Sugar: 2428
- Sodium: 100150
- Fat: 45
- Saturated Fat: 0.5
- Carbohydrates: 3438
- Fiber: 12
- Protein: 34
Keywords: brown sugar shaken espresso, copycat Starbucks, iced coffee, oat milk espresso, easy coffee recipe, homemade coffee drink


