Love this? Save it for later!
Share the inspiration with your friends
I was standing in the dairy aisle of the grocery store last Tuesday when the scent of a stranger’s banana—overripe, almost fermenting, sweet as honey—hit me from three carts over. And suddenly I was nine years old at my neighbor Mrs. Kowalski’s kitchen table, watching her mash bananas with a fork while she told me that the secret to good banana bread was to never, ever use a mixer.
Mrs. Kowalski isn’t around anymore, and I haven’t lived in that neighborhood in twenty years. But that smell—that specific, almost-too-ripe banana smell—grabbed me by the collar and dragged me straight back. I bought three bunches of the brownest bananas they had and practically ran home. I mean, honestly, I didn’t even grab a cart. I just stood there holding bananas like a crazy person.
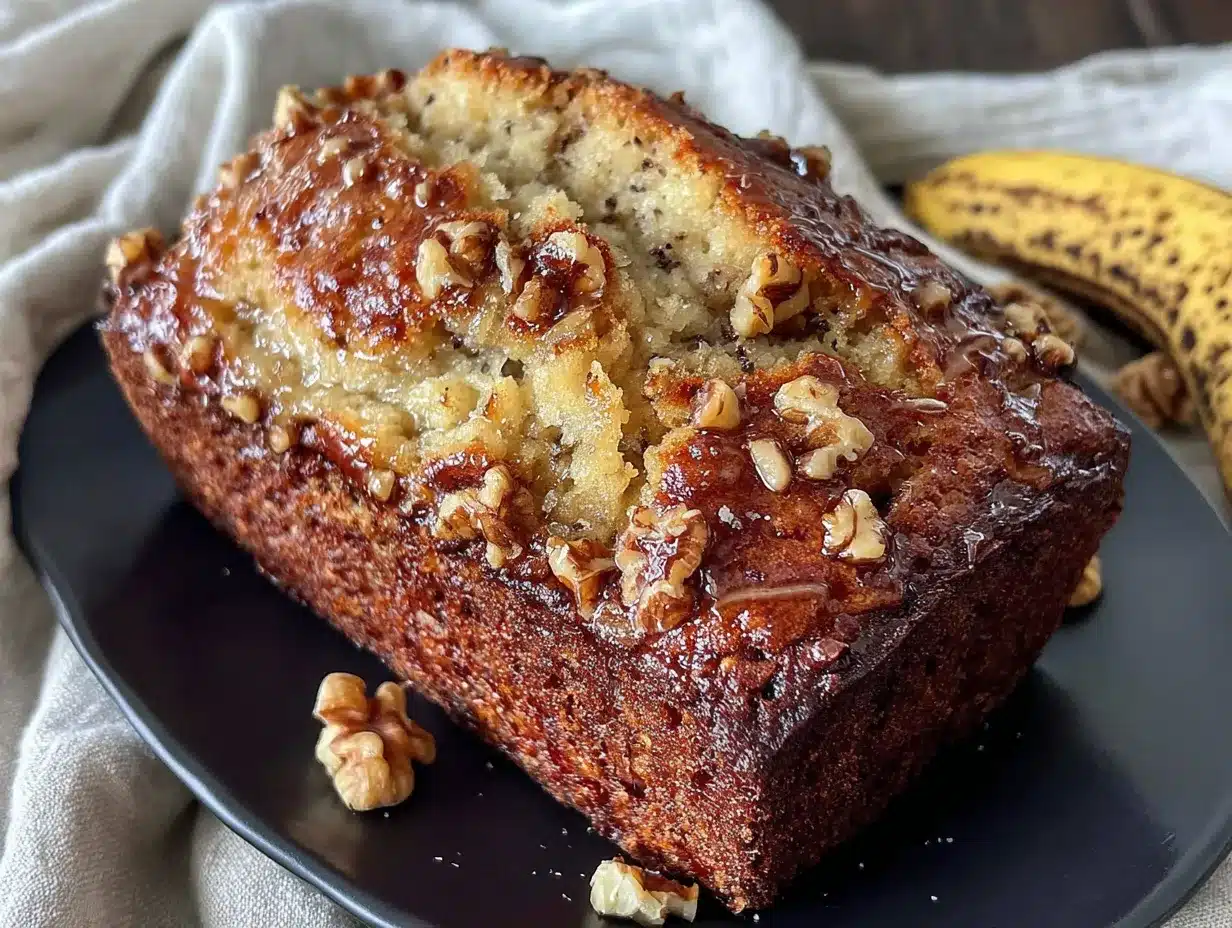
I’ve made banana bread a hundred times since then, but I’ve never forgotten her rule: no mixer. She said it toughens the crumb, makes it dense in all the wrong ways. And she was right. This cozy no-mixer banana bread with walnuts is my attempt to recreate that exact feeling—the warmth of her tiny kitchen, the way the afternoon light caught the dust motes, the first bite of a slice still warm from the pan.
Maybe you’ve been there too—chasing a taste you can’t quite put words to, trying to get back to a moment that feels just out of reach. This recipe is that for me. And I think it might become that for you too.
Why You’ll Love This Recipe
Let me tell you why this particular banana bread has earned a permanent spot in my rotation. I’ve tested it at least a dozen times—sometimes on purpose, sometimes because I forgot to set a timer—and it keeps getting better.
- No mixer required : You don’t need a stand mixer, hand mixer, or any fancy gadget. Just a bowl, a fork, and a little elbow grease. This is the kind of recipe you can make at 10 p.m. without waking anyone up.
- Simple ingredients : Flour, sugar, butter, eggs, bananas, walnuts, and a few pantry staples. That’s it. No buttermilk, no sour cream, no specialty flours.
- Perfect for cozy evenings : This is the bread you bake when the weather turns cold, when you’ve had a rough day, or when you just need something warm and sweet to hold in your hands.
- Crowd-pleaser : I’ve brought this to potlucks, book club meetings, and family dinners. It disappears every single time. Kids love it. Adults love it. My neighbor Steve—who claims he doesn’t like bananas—ate three slices.
- Unbelievably tender : Because we’re not using a mixer, the crumb stays soft, moist, and almost velvety. The walnuts add just enough crunch to keep things interesting.
What makes this recipe different from the rest? It’s the technique. Mixing by hand means you’re less likely to overwork the gluten, which keeps the bread light and tender. Plus, the walnuts are toasted before they go in—trust me on this one. It makes a world of difference.
This isn’t just another banana bread recipe. It’s the one you’ll make again and again, the one that makes you close your eyes after the first bite. It’s comfort food at its simplest and best.
What Ingredients You Will Need
This recipe uses simple, wholesome ingredients to deliver bold flavor and satisfying texture without the fuss. Most of these are pantry staples, so you probably already have them on hand.
For the Banana Bread
- 3 large ripe bananas, mashed (about 1 ½ cups) — the riper, the better. Look for bananas with lots of brown spots. They’re sweeter and easier to mash.
- ½ cup unsalted butter, melted and slightly cooled — I use Kerrygold for the rich flavor, but any unsalted butter works. Salted butter is fine too—just reduce the added salt to ¼ teaspoon.
- ¾ cup granulated sugar — you can use brown sugar for a deeper, more caramel-like flavor. I’ve done both and honestly, they’re both great.
- 2 large eggs, room temperature — cold eggs can seize the butter, so let them sit out for 15 minutes first.
- 1 teaspoon vanilla extract — pure vanilla is best, but imitation works in a pinch.
- 1 ½ cups all-purpose flour — spoon and level it. Don’t scoop directly from the bag, or you’ll end up with too much flour and dry bread.
- 1 teaspoon baking soda — this is the only leavening agent. Make sure it’s fresh.
- ½ teaspoon salt — fine sea salt or table salt.
- 1 cup walnut halves, toasted and roughly chopped — toast them in a dry pan over medium heat for 3-4 minutes until fragrant. This step is non-negotiable for the best flavor.
Optional Add-Ins
- ½ cup chocolate chips — dark or semi-sweet. I sometimes throw in a handful when I’m feeling extra.
- 1 teaspoon cinnamon — adds warmth and spice. Perfect for fall.
- 2 tablespoons flaxseed meal — for a little extra fiber. You won’t taste it.
Equipment Needed
You don’t need much for this recipe, which is honestly one of my favorite things about it. Here’s what you’ll need:
- Large mixing bowl — any size works, but a wide bowl makes mashing easier.
- Fork or potato masher — for mashing the bananas. I prefer a fork because it’s easier to control the texture.
- Wooden spoon or rubber spatula — for mixing the batter. A whisk works too, but you’ll want to switch to a spatula toward the end.
- 9×5-inch loaf pan — metal or glass both work. If you’re using glass, reduce the oven temperature by 25°F.
- Parchment paper — for lining the pan. This makes cleanup so much easier, and it helps the bread come out cleanly.
- Cooling rack — a wire rack lets air circulate so the bottom doesn’t get soggy. If you don’t have one, you can use the inverted loaf pan trick (flip it upside down and balance the bread on top).
- Measuring cups and spoons — accuracy matters, especially with flour and baking soda.
I’ve made this recipe with a cracked ceramic bowl and a bent fork, and it still turned out great. So don’t stress if your equipment isn’t fancy. It’s the technique that counts.
Preparation Method
Let’s get to the good part. Follow these steps, and you’ll have a loaf that’s golden, tender, and absolutely packed with flavor. I’ve included time estimates and sensory cues so you know exactly what to look for at each stage.
- Preheat your oven to 350°F (175°C). Position the rack in the center of the oven. While it’s heating, line your loaf pan with parchment paper, leaving a little overhang on the long sides. This will act as handles later.
- Toast the walnuts. Place the walnut halves in a dry skillet over medium heat. Shake the pan occasionally. After about 3-4 minutes, you’ll smell them—that warm, nutty aroma is your cue. They should look slightly darker and feel fragrant. Remove them from the pan immediately so they don’t burn, and let them cool. Once cool, roughly chop them. Set aside about ¼ cup for sprinkling on top.
- Mash the bananas. In your large mixing bowl, add the three ripe bananas. Use a fork to mash them until they’re mostly smooth with a few small lumps remaining. You want some texture—don’t turn them into a puree. This should take about 2 minutes. The mashed bananas should measure about 1 ½ cups.
- Add the wet ingredients. Pour the melted and slightly cooled butter into the bowl with the bananas. Add the sugar, eggs, and vanilla extract. Stir with your wooden spoon or spatula until everything is well combined. The mixture will look a little glossy and smell incredibly sweet. Don’t worry if it looks slightly separated—that’s normal.
- Mix the dry ingredients separately. In a small bowl, whisk together the flour, baking soda, and salt. This step ensures the baking soda is evenly distributed, so you don’t end up with a weird bitter spot in your bread. Yes, it’s an extra bowl to wash. Yes, it’s worth it.
- Combine wet and dry ingredients. Add the flour mixture to the banana mixture. Use a spatula to fold everything together gently. And I mean gently. Stir just until you no longer see streaks of flour. A few small lumps are totally fine. Overmixing will make the bread tough, so stop as soon as it comes together. This should take about 30 seconds of folding.
- Fold in the walnuts. Add the chopped walnuts (reserving the ¼ cup for topping) and fold them in with just a few strokes. Don’t overmix here either.
- Pour the batter into the prepared pan. Use your spatula to scrape every last bit into the pan. Spread it evenly, then sprinkle the reserved walnuts on top. Press them in very lightly so they stick to the batter.
- Bake for 55-65 minutes. Place the pan in the preheated oven. Bake until the top is deep golden brown and a toothpick inserted into the center comes out clean or with just a few moist crumbs. The bread should feel springy to the touch. If the top is browning too quickly (around the 40-minute mark), tent the pan loosely with aluminum foil.
- Cool in the pan for 15 minutes. Set the pan on a wire rack. Let it cool for 15 minutes—no less. Then use the parchment handles to lift the bread out and transfer it to the rack to cool completely. If you slice it too soon, it will fall apart. I know from experience. Trust me on the waiting.
Cooking Tips & Techniques
I’ve made this banana bread more times than I can count, and I’ve learned a few things along the way. Here are my best tips for getting it right every single time.
Use really ripe bananas. I cannot stress this enough. The bananas should be almost black with brown spots. They’ll be soft, sweet, and incredibly fragrant. If your bananas aren’t ripe enough, the bread will be less sweet and less flavorful. You can speed up ripening by placing bananas on a baking sheet in a 300°F oven for 15-20 minutes until the skins turn black. Let them cool before mashing.
Don’t overmix the batter. This is the most common mistake. When you overmix, you develop the gluten in the flour, which makes the bread dense and tough. Mix until the flour just disappears. A few streaks are fine. The batter should look thick and slightly lumpy.
Check for doneness early. Ovens vary wildly. Start checking at the 50-minute mark. Insert a toothpick or a thin knife into the center. If it comes out clean, it’s done. If it’s wet, give it another 5 minutes and check again.
Let it cool completely before slicing. I know it’s hard. The smell filling your kitchen is torture. But if you slice it while it’s hot, it will crumble and fall apart. The bread continues to set as it cools. I once cut into a loaf after 10 minutes and ended up with banana bread pudding instead. Delicious, but not what I was going for.
Toast the walnuts. I mentioned this earlier, but it bears repeating. Toasting brings out the natural oils and makes the walnuts taste richer and more complex. It takes four minutes and makes a huge difference.
Room temperature eggs matter. Cold eggs can cause the melted butter to seize up, creating a lumpy batter. Leave your eggs out for 15-20 minutes before starting. If you forget, place them in a bowl of warm water for 5 minutes.
Variations & Adaptations
This recipe is forgiving and adaptable. Here are some variations I’ve tried and loved.
Gluten-free version: Substitute the all-purpose flour with a 1:1 gluten-free baking flour blend. I’ve used Bob’s Red Mill with great results. The texture will be slightly more crumbly, but the flavor is still fantastic.
Dairy-free version: Replace the butter with melted coconut oil or a plant-based butter. I’ve used both, and coconut oil adds a subtle tropical note that pairs beautifully with banana. Just make sure your plant-based butter is unsalted.
Chocolate chip banana bread: Fold in ½ cup of dark chocolate chips along with the walnuts. The combination of chocolate and banana is classic for a reason. I sometimes do this when I need an extra dose of comfort.
Spiced banana bread: Add 1 teaspoon of cinnamon, ½ teaspoon of nutmeg, and ¼ teaspoon of cloves to the flour mixture. This version tastes like fall in a slice. Perfect for Thanksgiving morning or a chilly October afternoon.
Nut-free version: Simply omit the walnuts. You can replace them with an equal amount of chocolate chips, dried cranberries, or even shredded coconut. I’ve also used pepitas (pumpkin seeds) for a nut-free crunch.
Mini loaves or muffins: This batter works beautifully for mini loaves (bake for 30-35 minutes) or muffins (bake for 18-22 minutes). Adjust the time and check for doneness with a toothpick. Great for gifting or freezing.
Serving & Storage Suggestions
This banana bread is delicious in so many ways. Here’s how I like to serve and store mine.
Serving: I love this bread warm, just slightly above room temperature. Slice it thick and spread a little salted butter on top while it’s still warm. The butter melts into the crumb and it’s honestly heaven. You can also serve it with a drizzle of honey or a dollop of Greek yogurt for breakfast. For dessert, try it with a scoop of vanilla ice cream—the warm bread and cold ice cream combo is unbeatable.
Complementary dishes: This banana bread pairs beautifully with a hot cup of coffee or a mug of spiced chai. It’s also great alongside a bowl of fresh fruit for a light breakfast. If you’re serving it at a brunch, try it next to a fluffy scrambled eggs or a creamy yogurt parfait.
Storage: Once completely cool, wrap the loaf tightly in plastic wrap or aluminum foil. Store it at room temperature for up to 4 days. Do not refrigerate—the fridge dries it out. If your kitchen is very warm, you can store it in a cool, dark place.
Freezing: This bread freezes beautifully. Wrap the cooled loaf in plastic wrap, then in a layer of aluminum foil, and place it in a freezer bag. It will keep for up to 3 months. To thaw, leave it on the counter for a few hours or overnight. You can also freeze individual slices—wrap each one in plastic wrap and store them in a freezer bag. Perfect for grabbing a single serving when the craving hits.
Reheating: To reheat a slice, pop it in the toaster or microwave for 10-15 seconds. For a whole loaf, warm it in a 300°F oven for 10-15 minutes. The flavors actually deepen after a day or two, so day-old banana bread is often even better than fresh-baked.
Nutritional Information & Benefits
Here’s a rough estimate of the nutritional values per slice (based on 10 slices):
- Calories: 285
- Fat: 14g
- Carbohydrates: 36g
- Fiber: 2g
- Sugar: 18g
- Protein: 5g
Bananas are a great source of potassium, which supports heart health and muscle function. They also contain vitamin B6 and vitamin C. Walnuts are packed with omega-3 fatty acids, which are great for brain health. Plus, they add protein and healthy fats that help keep you full.
This recipe can be made gluten-free or dairy-free with simple substitutions, making it accessible for many dietary needs. It’s also egg-free if you replace the eggs with flax eggs (2 tablespoons flaxseed meal + 6 tablespoons water, let sit for 5 minutes).
I try to keep things balanced, and this banana bread fits into that philosophy. It’s a treat, yes, but it’s made with real, whole ingredients. That makes me feel a little better about having a second slice.
Conclusion
This cozy no-mixer banana bread with walnuts is more than just a recipe—it’s a little piece of comfort you can hold in your hands. It’s the bread you make when you need a warm hug on a cold day, when you want to fill your home with the smell of something good, when you’re chasing a memory you can’t quite name.
I hope you’ll make it your own. Add chocolate chips if that’s your thing. Swap the walnuts for pecans. Spread it with butter and eat it while it’s still warm. That’s the beauty of a recipe like this—it’s forgiving, it’s flexible, and it always delivers.
I’d love to hear how yours turns out. Did you make any changes? Did it bring back any memories? Drop a comment below and let me know. And if you share it on social media, tag me—I want to see your cozy creations. Until next time, happy baking.
Frequently Asked Questions
Can I use frozen bananas for this recipe?
Absolutely. Thaw them completely, then drain off any excess liquid before mashing. Frozen bananas are actually sweeter and easier to mash, so they work great.
Why did my banana bread sink in the middle?
This usually happens if the bread is underbaked or if you opened the oven door too early. Make sure you’re using fresh baking soda and that your oven temperature is accurate. Also, resist the urge to peek until at least the 45-minute mark.
Can I make this recipe vegan?
Yes. Replace the butter with coconut oil or vegan butter, and use flax eggs (2 tablespoons flaxseed meal + 6 tablespoons water) instead of regular eggs. The texture will be slightly denser, but it’s still delicious.
How do I know when the bananas are ripe enough?
The skin should be mostly brown or black, with lots of dark spots. The banana should feel soft when you squeeze it gently. If it smells sweet and almost fermented, you’re in the perfect spot.
Can I double this recipe?
Yes, it doubles beautifully. Use a larger bowl and bake in two loaf pans. You can also bake it in a 9×13-inch pan for a thinner, bar-style banana bread—just reduce the baking time to 30-35 minutes.
Pin This Recipe!
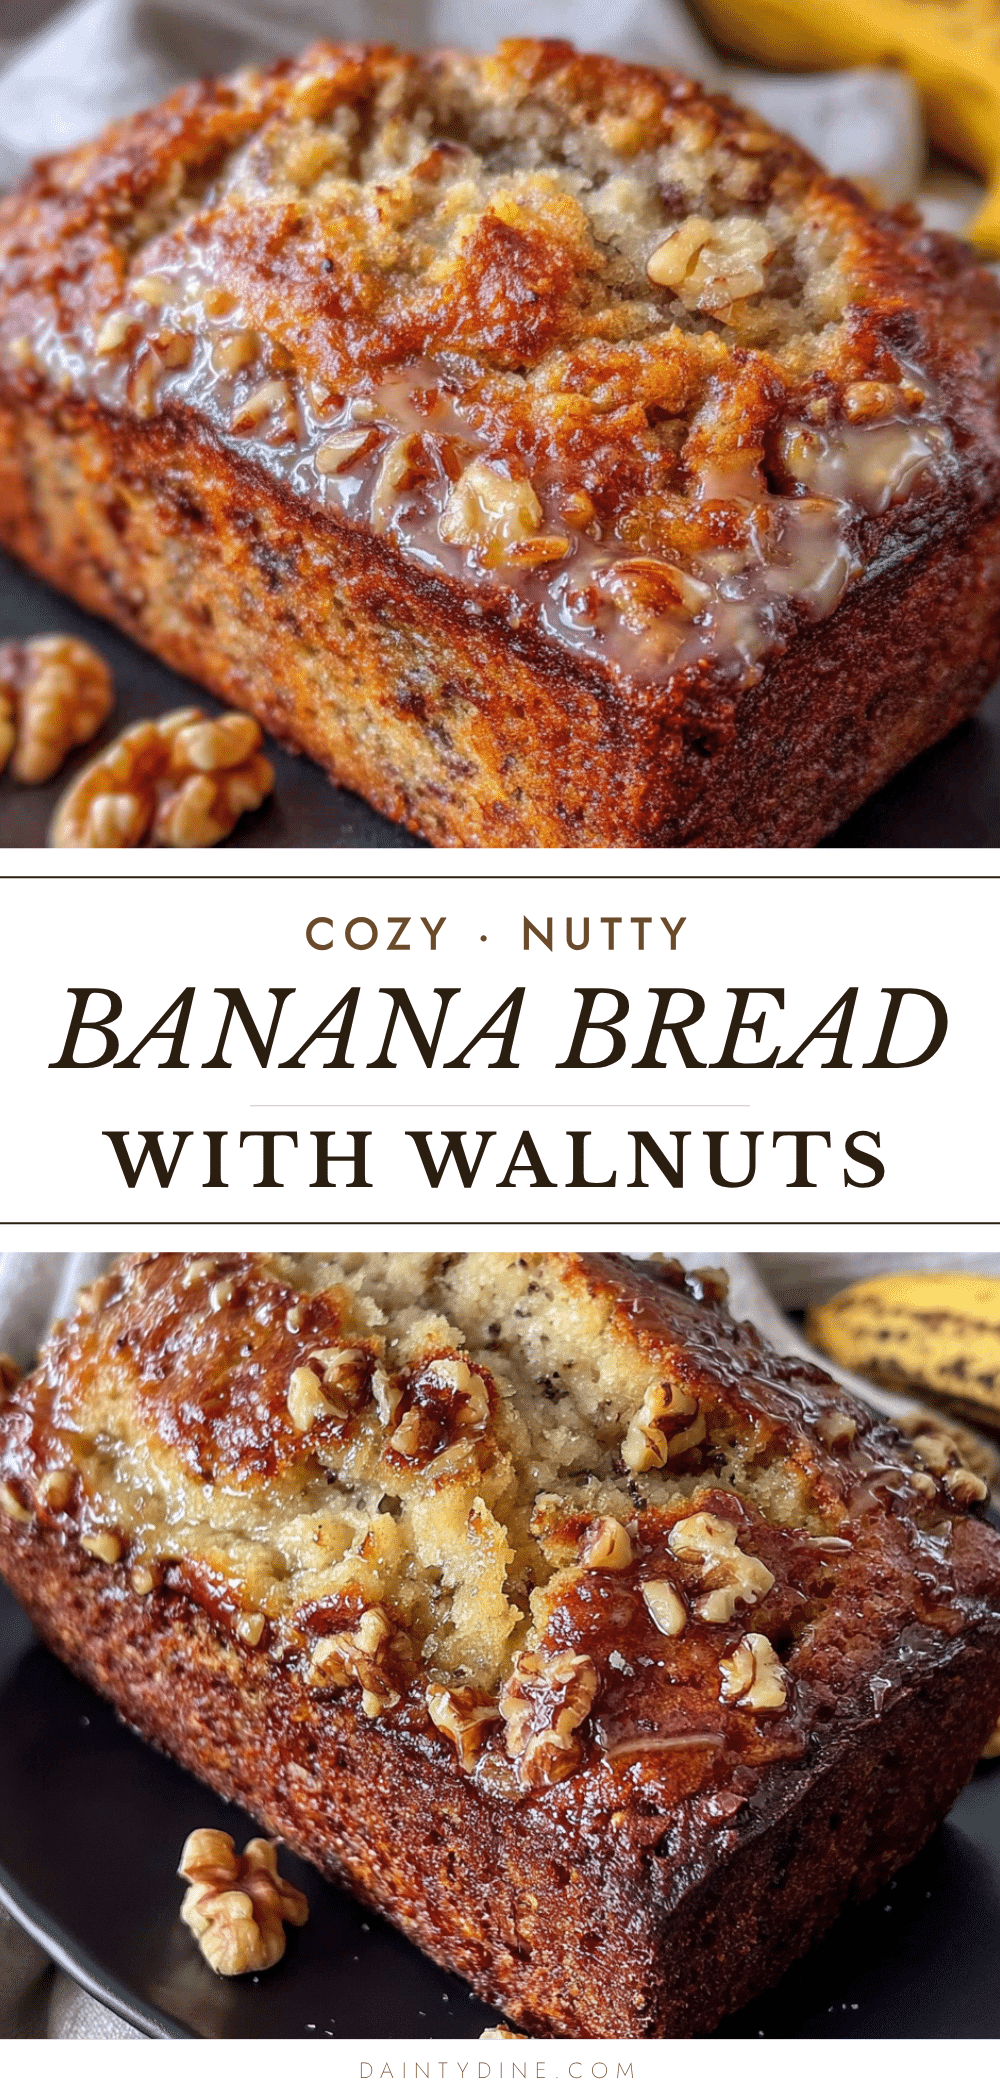
Cozy No-Mixer Banana Bread with Walnuts
This easy banana bread recipe requires no mixer and uses simple ingredients for a tender, moist loaf with toasted walnuts. Perfect for cozy evenings and guaranteed to be a crowd-pleaser.
- Prep Time: 15 minutes
- Cook Time: 55 minutes
- Total Time: 1 hour 10 minutes
- Yield: 10 servings 1x
- Category: Dessert
- Cuisine: American
Ingredients
- 3 large ripe bananas, mashed (about 1 ½ cups)
- ½ cup unsalted butter, melted and slightly cooled
- ¾ cup granulated sugar
- 2 large eggs, room temperature
- 1 teaspoon vanilla extract
- 1 ½ cups all-purpose flour
- 1 teaspoon baking soda
- ½ teaspoon salt
- 1 cup walnut halves, toasted and roughly chopped
Instructions
- Preheat your oven to 350°F (175°C). Position the rack in the center of the oven. Line your loaf pan with parchment paper, leaving overhang on the long sides.
- Toast the walnuts in a dry skillet over medium heat for 3-4 minutes until fragrant. Remove from pan, let cool, then roughly chop. Reserve ¼ cup for topping.
- In a large mixing bowl, mash the bananas with a fork until mostly smooth with a few small lumps (about 2 minutes).
- Add melted butter, sugar, eggs, and vanilla extract to the bananas. Stir until well combined.
- In a small bowl, whisk together flour, baking soda, and salt.
- Add the flour mixture to the banana mixture. Fold gently with a spatula until just combined (about 30 seconds). Do not overmix.
- Fold in the chopped walnuts (reserving ¼ cup for topping) with a few strokes.
- Pour the batter into the prepared pan. Spread evenly and sprinkle reserved walnuts on top, pressing lightly.
- Bake for 55-65 minutes until deep golden brown and a toothpick inserted in the center comes out clean. If browning too quickly, tent with foil at 40 minutes.
- Cool in the pan for 15 minutes, then transfer to a wire rack to cool completely before slicing.
Notes
Use very ripe bananas (mostly brown/black). Do not overmix the batter. Let bread cool completely before slicing. Toasting walnuts is non-negotiable for best flavor. Room temperature eggs prevent butter from seizing.
Nutrition
- Serving Size: 1 slice
- Calories: 285
- Sugar: 18
- Sodium: 210
- Fat: 14
- Saturated Fat: 5
- Carbohydrates: 36
- Fiber: 2
- Protein: 5
Keywords: banana bread, no mixer, walnuts, easy recipe, comfort food


