Love this? Save it for later!
Share the inspiration with your friends
Maggie wasn’t trying to impress anyone. I’d stopped by her place on a gray December Tuesday to drop off a casserole dish she’d lent me months ago, and the smell hit me before I even got through the door. It wasn’t just chocolate—it was chocolate with something else, something warm and almost minty, like a candy cane had dissolved into the air itself. I walked into her kitchen, and there it was: a whole table covered in little bowls of sprinkles, crushed candy, and these huge, fluffy white marshmallows that looked nothing like the sad bagged ones from the store.
She was scrolling through her phone, completely unbothered, while this incredible setup sat there looking like something from a magazine. “Oh, that?” she said when I asked. “It’s just hot chocolate. The kids wanted something fun after school.” Just hot chocolate. I mean, honestly, I’ve been known to stress over a dinner party for three days, and here she was casually creating the most inviting drink station I’d ever seen like it was no big deal. She handed me a mug and pointed at the marshmallows. “Those are homemade. Don’t tell anyone, but they’re stupid easy.”
That first sip was a revelation. The cocoa was rich but not too sweet, and the marshmallow melted into this silky, peppermint-kissed cloud on top. I stood there in her messy kitchen, leaning against the counter, and I think I had three cups before I left. Maggie just shrugged and said she’d email me the recipe. She never did, of course. So I spent the next week figuring it out myself, and honestly? I think my version might be even better. Maybe you’ve been there—tasting something at a friend’s house and knowing you’d never rest until you could make it yourself. This cozy hot cocoa bar with peppermint marshmallows is that recipe for me, and now it’s yours too.
Why You’ll Love This Recipe
Let me tell you why this cozy hot cocoa bar with peppermint marshmallows has become my absolute favorite thing to set up all winter long. I’ve tested this recipe about seven times now—much to my family’s delight—and I’ve ironed out every little detail so you don’t have to guess.
- Surprisingly Simple: The marshmallows take about 15 minutes of active work. I know “homemade marshmallows” sounds fancy, but it’s basically sugar, gelatin, and patience. You’ve got this.
- Pantry-Friendly: You probably already have cocoa powder, sugar, and milk. The peppermint extract and gelatin are easy to find at any grocery store. No weird specialty ingredients here.
- Perfect for Holiday Gatherings: Whether it’s Christmas morning, a New Year’s Eve party, or just a snowy Saturday, this setup makes everything feel special. It’s the kind of thing that gets people lingering in the kitchen.
- Crowd-Pleaser for All Ages: Kids go crazy for the toppings bar, and adults appreciate that the cocoa is actually rich and not watery. Everyone wins.
- Next-Level Comfort: The texture of a homemade marshmallow melting into hot cocoa is honestly life-changing. It’s softer, fluffier, and the peppermint flavor is subtle—not like eating a toothpaste tube.
What makes this different from every other hot cocoa recipe out there? It’s the marshmallows, honestly. Most people buy the store-bought ones, which are fine, but they don’t have that pillowy, melt-in-your-mouth quality. These peppermint marshmallows are light, slightly chewy, and they dissolve into the cocoa in a way that makes every sip feel luxurious. Plus, setting up a bar means everyone gets to customize their own cup. It’s interactive, it’s fun, and it takes the pressure off you as the host. This isn’t just hot chocolate—it’s an experience.
What Ingredients You Will Need
This cozy hot cocoa bar with peppermint marshmallows uses simple ingredients, but each one plays an important role. Here’s what you’ll need to grab.
For the Peppermint Marshmallows
- 3 envelopes (about 21g) unflavored gelatin (I use Knox brand—it’s reliable and easy to find)
- 1 cup (240ml) cold water, divided (half for blooming the gelatin, half for the sugar syrup)
- 2 cups (400g) granulated sugar (don’t substitute with alternative sweeteners here; the texture won’t work)
- 1 cup (240ml) light corn syrup (this prevents crystallization and gives that perfect chewy texture)
- 1/4 teaspoon salt (just a pinch to balance the sweetness)
- 1 teaspoon vanilla extract (pure, not imitation, if you can swing it)
- 1/2 teaspoon peppermint extract (start with less—you can always add more, but you can’t take it out)
- Powdered sugar and cornstarch (for dusting—equal parts, about 1/4 cup each)
- Red food coloring (optional, for swirls—gel food coloring works best)
- Crushed candy canes (for rolling the marshmallows, about 1/2 cup)
For the Hot Cocoa Base
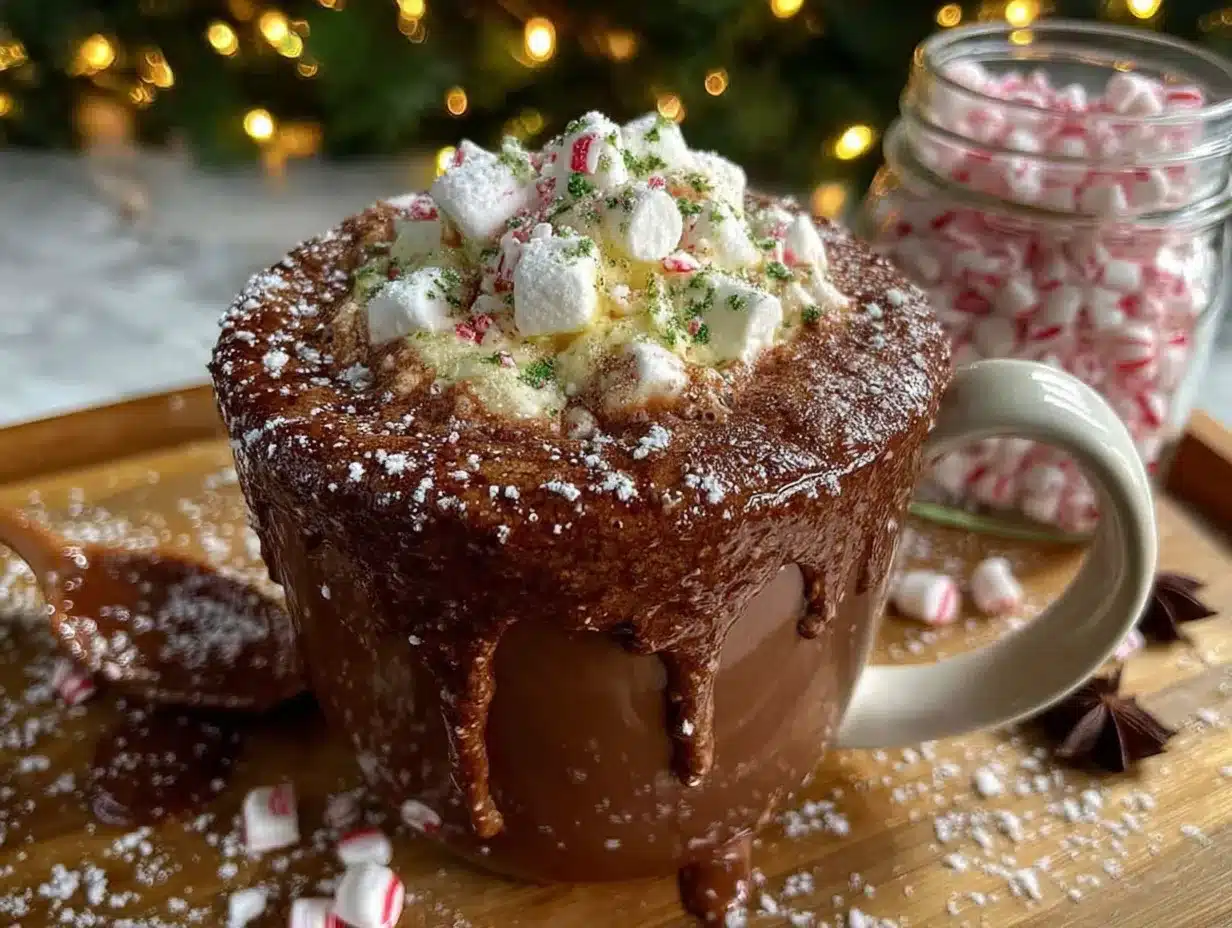
- 1/2 cup (50g) unsweetened cocoa powder (I prefer Dutch-processed for a smoother, less acidic flavor—Ghirardelli is my go-to)
- 1/2 cup (100g) granulated sugar (adjust to your sweetness preference)
- 1/4 teaspoon salt (trust me on this—it makes the chocolate taste more chocolatey)
- 4 cups (960ml) whole milk (you can use 2% or a dairy-free alternative like oat milk, but whole milk gives the richest texture)
- 1 teaspoon vanilla extract (added at the end to preserve the flavor)
- 1/2 cup (120ml) heavy cream (optional, but it makes the cocoa incredibly velvety)
For the Toppings Bar
- Whipped cream (homemade or store-bought—no judgment here)
- Chocolate shavings or curls
- Mini chocolate chips
- Crushed candy canes or peppermint candies
- Caramel sauce or chocolate syrup
- Sprinkles (holiday-themed ones are fun)
- Cinnamon sticks (for stirring)
- Mini marshmallows (if you want a backup option)
Equipment Needed
You don’t need a professional kitchen for this cozy hot cocoa bar with peppermint marshmallows, but a few tools will make your life much easier.
- Stand mixer or hand mixer: Whipping the marshmallow mixture by hand is possible but absolutely miserable. A stand mixer with the whisk attachment is ideal, but a hand mixer works fine—just be prepared to hold it for about 10 minutes.
- Candy thermometer: This is non-negotiable for the marshmallows. You need the sugar syrup to reach exactly 240°F (115°C). I’ve ruined a batch by guessing, so trust me on this one. A simple instant-read thermometer works too.
- 8×8-inch baking pan: For setting the marshmallows. Line it with parchment paper and let it hang over the edges—that’s your handle for lifting the marshmallow block out later.
- Medium saucepan: For the sugar syrup. Use one with a heavy bottom to prevent scorching.
- Spatula: A silicone one is best for scraping every bit of marshmallow mixture into the pan.
- Sharp knife or pizza cutter: For cutting the marshmallows. A pizza cutter dusted with powdered sugar works like a dream.
- Large pot or Dutch oven: For the hot cocoa base. You want something big enough to whisk without splashing.
- Whisk: A good balloon whisk helps prevent lumps in the cocoa.
- Small bowls and spoons: For setting up your toppings bar. Get creative with what you have—ramekins, mason jars, or even muffin tins work great.
Budget-friendly tip: If you don’t have a candy thermometer, you can use the cold water test—drop a bit of syrup into cold water; if it forms a firm ball that holds its shape, you’re there. But honestly, a thermometer is like eight bucks and saves so much guesswork.
Preparation Method
Let’s walk through this step by step. I’ve broken it down so you can make the marshmallows a day ahead (they actually get better overnight) and then set up the cocoa bar right before serving.
Make the Peppermint Marshmallows (Day Before, if Possible)
- Prepare your pan: Line an 8×8-inch baking pan with parchment paper, letting it hang over two opposite sides. Spray the parchment lightly with non-stick spray, then dust it with a mixture of equal parts powdered sugar and cornstarch. Set aside.
- Bloom the gelatin: In the bowl of your stand mixer, sprinkle the 3 envelopes of gelatin over 1/2 cup (120ml) of cold water. Stir gently to combine, then let it sit for about 10 minutes. It’ll look like a firm, rubbery blob—that’s good. That means it’s activated.
- Make the sugar syrup: In a medium saucepan, combine the remaining 1/2 cup (120ml) water, 2 cups sugar, 1 cup corn syrup, and 1/4 teaspoon salt. Stir gently over medium heat until the sugar dissolves, then stop stirring. Clip your candy thermometer to the side of the pan and bring the mixture to a boil. Cook until it reaches 240°F (115°C)—this takes about 8-10 minutes. Don’t walk away; sugar syrup can burn fast.
- Combine and whip: With the mixer running on low speed, carefully pour the hot sugar syrup into the gelatin mixture. It’ll be steaming, so go slow and avoid splashing. Once it’s all in, gradually increase the speed to high and whip for about 10-12 minutes. The mixture will turn white, thick, and glossy. It should look like marshmallow fluff and hold a soft peak when you lift the whisk.
- Add flavor and color: With the mixer on low, add the vanilla extract and peppermint extract. If you want a red swirl, melt a few drops of red gel food coloring in 1 teaspoon of water, then drizzle it into the bowl and give it one or two quick pulses—don’t overmix, or you’ll lose the swirl effect.
- Pour and set: Use your silicone spatula to scrape the marshmallow mixture into the prepared pan. Spread it evenly—it’s sticky, so lightly wet your spatula or fingers to smooth the top. Let it sit uncovered at room temperature for at least 4 hours, or overnight. The texture gets better after a full 24 hours.
- Cut and coat: Dust a cutting board with the powdered sugar-cornstarch mixture. Turn the marshmallow block out onto the board and peel off the parchment. Use a sharp knife or pizza cutter (dusted with the mixture) to cut into squares. Toss each square in more of the powdered sugar mixture, then roll the edges in crushed candy canes if you’d like. Store in an airtight container for up to two weeks—if they last that long.
Make the Hot Cocoa Base (Just Before Serving)
- Whisk the dry ingredients: In a large pot or Dutch oven, whisk together the cocoa powder, sugar, and salt. Make sure there are no lumps—a fork works well for breaking them up.
- Add a splash of milk: Pour in about 1/2 cup (120ml) of the milk and whisk it into the dry ingredients to form a smooth paste. This step prevents lumps, I promise.
- Add the rest: Gradually whisk in the remaining milk and the heavy cream (if using). Turn the heat to medium and cook, whisking occasionally, until the cocoa is steaming hot but not boiling—about 5-7 minutes. Boiling can make the cocoa taste scorched and separate the milk.
- Finish with vanilla: Remove from heat and stir in the vanilla extract. Taste and adjust sweetness if needed. Keep warm on the stove over low heat, or pour into a slow cooker set to warm for serving.
Set Up the Hot Cocoa Bar
- Arrange your toppings: Put each topping in its own small bowl. Place them in a row or cluster on your counter or table so guests can move down the line easily.
- Display the marshmallows: Pile your peppermint marshmallows in a cute bowl or on a small platter. They’re the star of the show, so give them some space.
- Provide mugs and ladles: Set out your mugs (I love using clear glass ones so you can see the layers), a ladle for the cocoa, and maybe some long spoons for stirring.
- Add signs if you’re feeling fancy: Little chalkboard labels or handwritten tags for each topping make the bar look intentional and help guests know what’s what.
Cooking Tips & Techniques
I’ve made this cozy hot cocoa bar with peppermint marshmallows enough times to learn a few things the hard way. Here’s what I wish someone had told me.
Don’t rush the marshmallow whipping. I know it feels like forever, but those 10-12 minutes on high speed are crucial. The mixture needs to cool slightly while whipping to hold its structure. If you stop too early, your marshmallows will be flat and sticky instead of fluffy. You’re looking for that glossy, thick texture that reminds you of shaving cream.
Humidity is the enemy of marshmallows. I learned this one on a rainy day, and let me tell you, it was a disaster. The marshmallows never set properly and stayed tacky. If it’s humid outside, save this recipe for a drier day, or run your air conditioner to lower the humidity in your kitchen.
For the cocoa, low and slow wins the race. I used to crank the heat, thinking I’d save time, but I ended up with a grainy, slightly burnt mess. Medium heat, steady whisking, and patience give you that silky-smooth texture. Also, don’t let it boil—steaming hot is perfect.
Make the marshmallows ahead of time. Honestly, they’re better on day two. The texture firms up perfectly, and the flavors meld together. Plus, it’s one less thing to do on the day of your gathering. I often make them two days ahead and store them in an airtight container.
Keep your knife dusted. When cutting marshmallows, dip your knife or pizza cutter in the powdered sugar mixture between each cut. It prevents sticking and gives you clean, beautiful squares. I forgot this once and ended up with a sticky, torn mess that looked like a toddler had attacked it.
Variations & Adaptations
One of the best things about this cozy hot cocoa bar with peppermint marshmallows is how flexible it is. Here are some ways to make it your own.
Dairy-Free Version: Swap the whole milk for oat milk or full-fat coconut milk. Oat milk is my favorite because it’s creamy without being overpowering. Use a dairy-free heavy cream alternative, or just skip it. The marshmallows are naturally dairy-free, so you’re good there.
Spiked Hot Cocoa: For an adult version, set out a small bottle of peppermint schnapps, bourbon, or Irish cream. Guests can add a splash to their mug. I’ve also tried it with a dark rum, and the molasses notes pair beautifully with the chocolate.
White Chocolate Cocoa Bar: Swap the cocoa powder for white chocolate. Melt 8 ounces of good-quality white chocolate with the milk, and use white chocolate shavings for the topping. It’s a completely different vibe—creamy, sweet, and perfect with the peppermint marshmallows.
Spiced Hot Cocoa: Add a cinnamon stick, a pinch of nutmeg, and a star anise to the milk while it heats. Strain them out before serving. The warm spices add a cozy depth that’s amazing for fall and winter gatherings.
Mint Chocolate Chip Twist: Stir mini chocolate chips into the hot cocoa just before serving. They melt slightly and give you little pockets of chocolate in every sip. Top with the peppermint marshmallows and a sprinkle of crushed candy canes.
Low-Sugar Option: Use a sugar-free cocoa powder and a low-carb sweetener like monk fruit or allulose in the cocoa base. The marshmallows are harder to adapt because sugar is essential for the structure, but you can skip them and use sugar-free whipped cream instead.
Serving & Storage Suggestions
This cozy hot cocoa bar with peppermint marshmallows is best served warm and fresh, but there are a few tricks to make it work for your schedule.
Serving Temperature: The cocoa should be steaming hot but not boiling—around 160°F (71°C) is perfect. If it’s too hot, it’ll melt the marshmallows instantly instead of letting them slowly dissolve. I like to pour the cocoa into mugs and let guests add their own marshmallows and toppings.
Presentation Ideas: Use clear glass mugs if you have them—they show off the layers of cocoa, marshmallow, and toppings beautifully. Arrange your toppings bar in a logical flow: mugs first, then cocoa, then marshmallows, then dry toppings, then wet toppings like caramel sauce. A little height variation (use cake stands or overturned bowls) makes the display more inviting.
Storage for Leftover Cocoa: Store leftover hot cocoa in an airtight container in the refrigerator for up to 3 days. Reheat gently on the stove or in the microwave, stirring frequently. You may need to add a splash of milk to thin it out, as it thickens as it sits.
Storage for Marshmallows: Keep the peppermint marshmallows in an airtight container at room temperature for up to 2 weeks. Don’t refrigerate them—they’ll get sticky and weep moisture. If you’re stacking them, put a piece of parchment paper between layers to prevent sticking.
Freezing Marshmallows: You can freeze them for up to 3 months! Place them in a single layer on a baking sheet, freeze until solid, then transfer to a freezer bag. Thaw at room temperature for about 30 minutes before serving. They’ll be slightly softer but still delicious.
Flavor Development: The cocoa actually tastes better the next day—the flavors meld and deepen overnight. I sometimes make the cocoa base a day ahead and reheat it slowly. Just be sure to whisk it well before serving, as it may separate slightly in the fridge.
Nutritional Information & Benefits
Let’s be real—this is a treat, not a health food. But that doesn’t mean it’s without some redeeming qualities.
Estimated Nutritional Values (per serving, based on 1 cup cocoa with 1 marshmallow and no additional toppings):
| Nutrient | Amount |
|---|---|
| Calories | 320 |
| Total Fat | 12g |
| Saturated Fat | 7g |
| Carbohydrates | 52g |
| Sugar | 44g |
| Protein | 8g |
| Calcium | 250mg |
| Iron | 2mg |
Health Highlights: Cocoa powder is rich in antioxidants called flavonoids, which can support heart health and reduce inflammation. Using whole milk provides calcium and vitamin D for bone health. The peppermint in the marshmallows can aid digestion and soothe an upset stomach—though let’s be honest, you’re not drinking this for medicinal reasons.
Dietary Considerations: This recipe contains dairy and gelatin (which is animal-based, so it’s not vegan). For a vegan version, use oat milk and a vegan marshmallow recipe that uses agar-agar instead of gelatin. The marshmallows are gluten-free, but always check your candy cane labels if you’re serving someone with celiac disease—some brands use wheat-based stabilizers.
My Perspective: I believe in balance. This cozy hot cocoa bar with peppermint marshmallows is an occasional indulgence, not an everyday thing. It’s for snowy afternoons, holiday parties, and moments when you want to feel wrapped in comfort. Enjoy it fully, without guilt, and maybe take a walk afterward. That’s my philosophy, anyway.
Conclusion
This cozy hot cocoa bar with peppermint marshmallows has become my favorite way to gather people around the kitchen. There’s something about a steaming mug of rich cocoa topped with a homemade marshmallow that makes everyone slow down and actually talk to each other. No phones, no rushing—just warm drinks and good company.
I hope you make this your own. Maybe you add a dash of cinnamon, or you skip the peppermint and go for vanilla bean marshmallows instead. Maybe your kids invent a crazy topping combination that becomes a family tradition. That’s the beauty of a bar setup—it invites creativity.
If you try this recipe, I’d love to hear about it. Drop a comment below and tell me what toppings your family loved, or tag me in your photos if you share them online. Honestly, seeing your hot cocoa bars makes my day. And if you have questions about the marshmallows or the cocoa, just ask—I’ve probably made every mistake possible, so I can help you avoid them.
Now go make some cocoa. You deserve it.
Frequently Asked Questions
Can I use store-bought marshmallows instead of making my own?
Absolutely, but the texture and flavor won’t be the same. Homemade peppermint marshmallows are softer, fluffier, and have a more subtle peppermint flavor. If you’re short on time, buy large marshmallows and toss them with a little peppermint extract and crushed candy canes. It’s a decent shortcut, but I promise the homemade version is worth the effort at least once.
How do I prevent my marshmallows from being too sticky?
Sticky marshmallows usually mean one of two things: either your sugar syrup didn’t reach 240°F (115°C), or the humidity in your kitchen is too high. Use a reliable candy thermometer and try to make them on a dry day. Also, dust your cutting surface and knife generously with the powdered sugar-cornstarch mixture—it acts like a non-stick shield.
Can I make the hot cocoa in a slow cooker?
Yes! This is actually my favorite method for parties. Make the cocoa on the stovetop first (to ensure the cocoa powder dissolves completely), then pour it into a slow cooker set to warm. It’ll stay perfect for hours. Just give it a stir every 30 minutes or so to prevent a skin from forming on top.
What’s the best way to crush candy canes for the topping?
Put the candy canes in a sturdy zip-top bag, seal it, and bash them with a rolling pin or the bottom of a heavy skillet. Don’t pulverize them into powder—you want some small chunks and some finer pieces for texture. I like to leave a few slightly larger pieces for visual appeal. And pro tip: do this before you make the marshmallows, because the noise is satisfying but loud.
How far ahead can I set up the toppings bar?
You can set up the dry toppings (sprinkles, chocolate shavings, crushed candy canes) a day in advance. Just cover them with plastic wrap or put lids on the bowls. The marshmallows can sit out for a few hours, but don’t add the whipped cream or wet sauces until right before serving. I usually set everything up about an hour before guests arrive, then pour the hot cocoa into the slow cooker right as people start showing up.
Pin This Recipe!
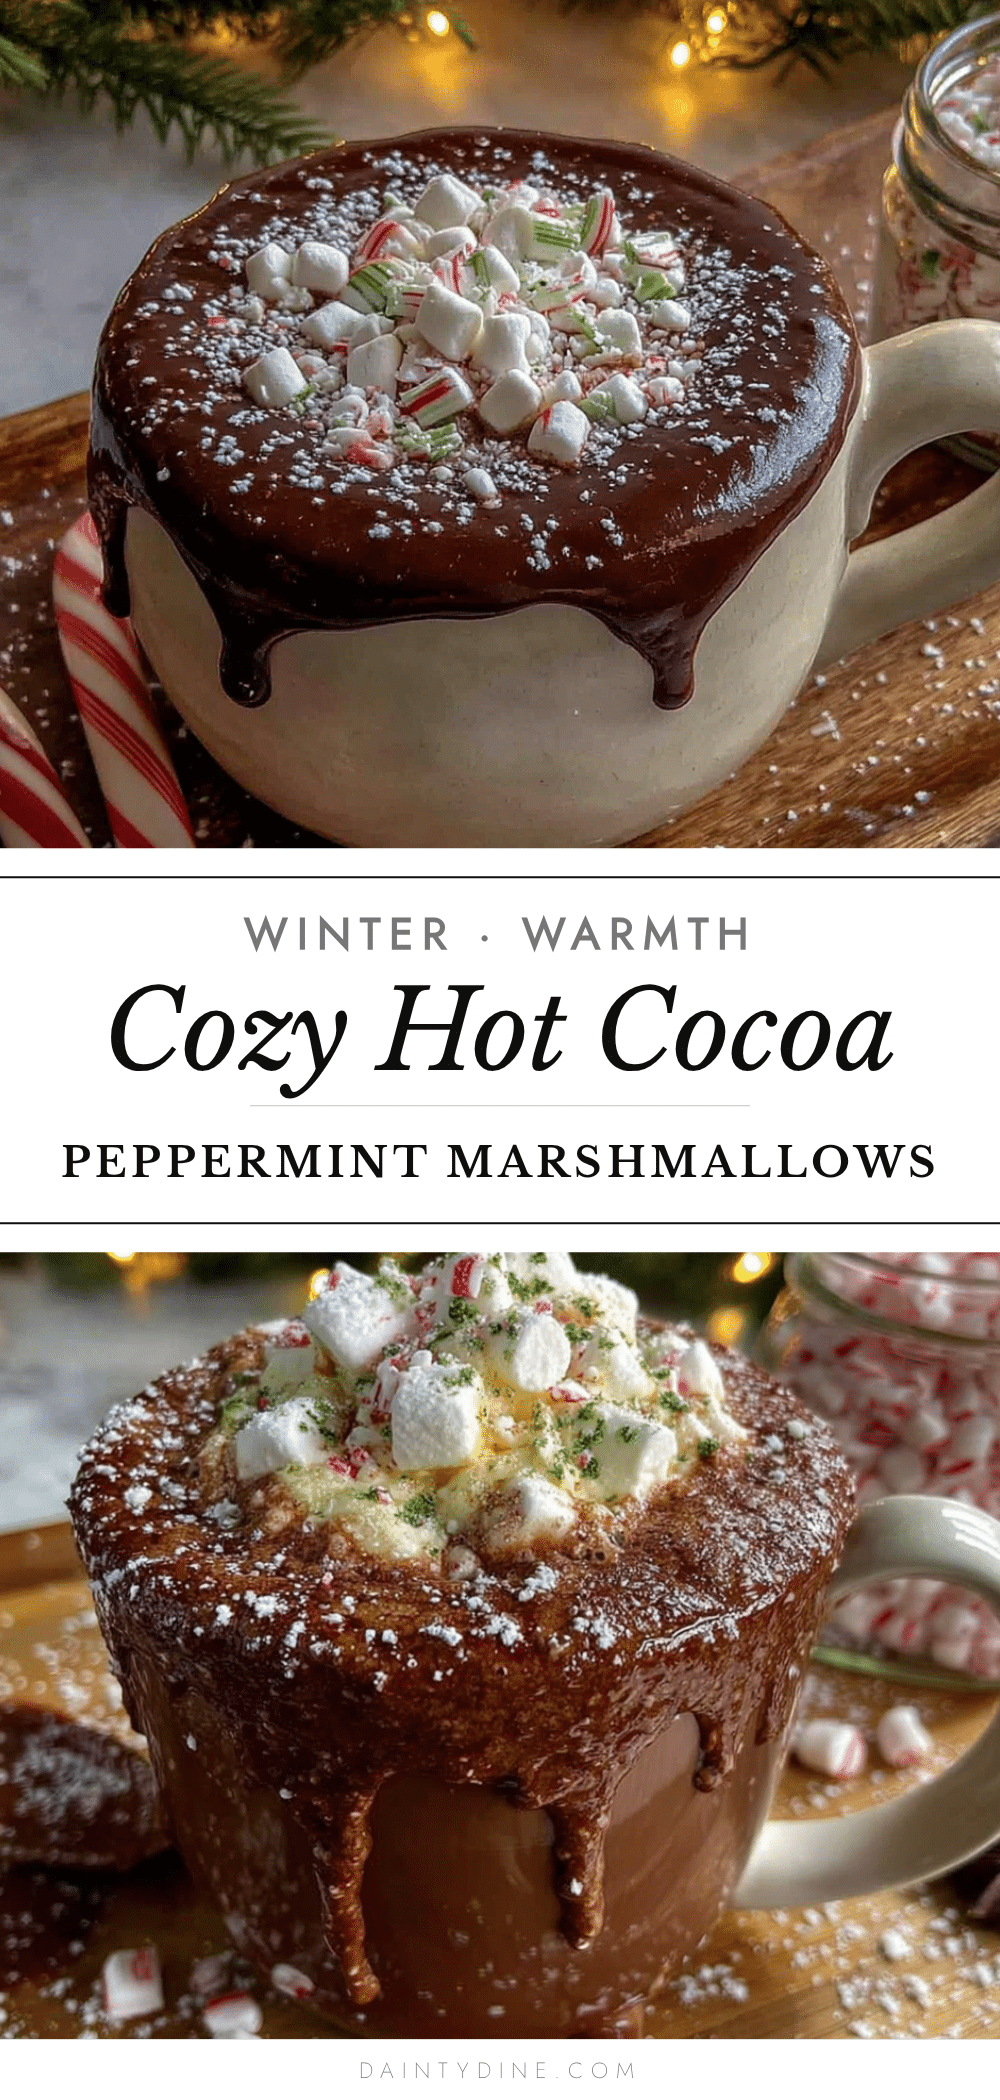
Cozy Hot Cocoa Bar with Peppermint Marshmallows

A rich, velvety hot cocoa base paired with homemade peppermint marshmallows and a customizable toppings bar, perfect for holiday gatherings and cozy winter days.
- Prep Time: 15 minutes
- Cook Time: 30 minutes
- Total Time: 45 minutes
- Yield: 8 servings 1x
- Category: Beverage
- Cuisine: American
Ingredients
- 3 envelopes (about 21g) unflavored gelatin
- 1 cup (240ml) cold water, divided
- 2 cups (400g) granulated sugar
- 1 cup (240ml) light corn syrup
- 1/4 teaspoon salt
- 1 teaspoon vanilla extract
- 1/2 teaspoon peppermint extract
- Powdered sugar and cornstarch (for dusting, about 1/4 cup each)
- Red food coloring (optional, for swirls)
- Crushed candy canes (for rolling, about 1/2 cup)
- 1/2 cup (50g) unsweetened cocoa powder
- 1/2 cup (100g) granulated sugar
- 1/4 teaspoon salt
- 4 cups (960ml) whole milk
- 1 teaspoon vanilla extract
- 1/2 cup (120ml) heavy cream (optional)
- Whipped cream (for serving)
- Chocolate shavings or curls (for serving)
- Mini chocolate chips (for serving)
- Crushed candy canes or peppermint candies (for serving)
- Caramel sauce or chocolate syrup (for serving)
- Sprinkles (for serving)
- Cinnamon sticks (for serving)
- Mini marshmallows (optional, for serving)
Instructions
- Prepare the pan: Line an 8×8-inch baking pan with parchment paper, letting it hang over two opposite sides. Spray lightly with non-stick spray and dust with a mixture of equal parts powdered sugar and cornstarch. Set aside.
- Bloom the gelatin: In the bowl of a stand mixer, sprinkle the gelatin over 1/2 cup (120ml) cold water. Stir gently and let sit for about 10 minutes until firm.
- Make the sugar syrup: In a medium saucepan, combine remaining 1/2 cup (120ml) water, 2 cups sugar, 1 cup corn syrup, and 1/4 teaspoon salt. Stir over medium heat until sugar dissolves, then bring to a boil. Cook until it reaches 240°F (115°C) on a candy thermometer, about 8-10 minutes.
- Combine and whip: With mixer on low, carefully pour hot syrup into gelatin mixture. Gradually increase speed to high and whip for 10-12 minutes until thick, white, and glossy.
- Add flavor and color: On low speed, add vanilla and peppermint extracts. For a red swirl, add a few drops of red gel food coloring dissolved in 1 teaspoon water and pulse briefly.
- Pour and set: Scrape mixture into prepared pan, spread evenly, and let sit uncovered at room temperature for at least 4 hours or overnight.
- Cut and coat: Dust a cutting board with powdered sugar-cornstarch mixture. Turn out marshmallow block, peel off parchment, and cut into squares. Toss in more dusting mixture and roll edges in crushed candy canes if desired. Store in airtight container up to 2 weeks.
- Make the hot cocoa base: In a large pot, whisk together cocoa powder, sugar, and salt. Add about 1/2 cup (120ml) milk to form a smooth paste. Gradually whisk in remaining milk and heavy cream (if using). Heat over medium, whisking occasionally, until steaming hot but not boiling, about 5-7 minutes. Remove from heat and stir in vanilla extract. Keep warm on low heat or in a slow cooker.
- Set up the hot cocoa bar: Arrange toppings in small bowls. Display peppermint marshmallows prominently. Provide mugs, a ladle for cocoa, and long spoons. Add labels if desired.
Notes
Make marshmallows a day ahead for best texture. Humidity can affect marshmallow setting; avoid making on rainy days. For dairy-free, use oat milk and skip heavy cream. Marshmallows can be frozen for up to 3 months.
Nutrition
- Serving Size: 1 cup cocoa with 1 m
- Calories: 320
- Sugar: 44
- Sodium: 250
- Fat: 12
- Saturated Fat: 7
- Carbohydrates: 52
- Fiber: 2
- Protein: 8
Keywords: hot cocoa, hot chocolate, peppermint marshmallows, homemade marshmallows, cocoa bar, winter drink, holiday recipe, Christmas drink


