Love this? Save it for later!
Share the inspiration with your friends
It was 11:47 PM on a drizzly Thursday in early March, and I had a very specific craving for something warm, dense, and faintly sweet. The kind of craving that doesn’t care about logic or the fact that you have to wake up in six hours. I didn’t have any yeast—because who keeps yeast on hand, honestly—but I had buttermilk left over from another project, a bag of flour, and a half-empty jar of currants that were starting to look a little lonely. And then it hit me: Irish soda bread. The bread that doesn’t need to rise, doesn’t need to prove itself (pun absolutely intended), and doesn’t need a single fancy ingredient.
I remember standing there in the dim light of my kitchen, the rain tapping against the window, thinking, “This is either going to be a disaster or the best decision I’ve made all week.” I pulled out my grandmother’s old mixing bowl—the one with the tiny chip on the rim that I refuse to throw away—and just started throwing things together. I mean, I measured, but there was a looseness to it. A late-night impulsiveness that made the whole thing feel like an experiment rather than a recipe. The dough came together in about four minutes flat, which felt suspiciously easy. I shaped it into a rough round, slashed a cross on top (for luck, or just because it looks right), and slid it into the oven.
The smell that filled my apartment was ridiculous. Like, stop-what-you’re-doing-and-just-breathe ridiculous. That toasty, slightly tangy aroma of buttermilk and flour baking into something that felt ancient and comforting. When I pulled it out, the crust was golden and crackling, and the currants had burst into little jammy pockets throughout the crumb. I cut a thick slice while it was still warm, slathered it with salted butter, and let me tell you—I stood at the counter at midnight eating bread like it was the most normal thing in the world. Maybe you’ve been there, standing in your own kitchen at a ridiculous hour, eating something you made on a whim, and realizing it’s exactly what you needed.
That loaf became my go-to. Not because it’s fancy, but because it’s the opposite of fancy. It’s honest bread. The kind that doesn’t pretend to be anything other than what it is: flour, buttermilk, a little soda, and some dried fruit. And honestly, that’s all it needs to be.
Why You’ll Love This Recipe
This Easy Rustic Irish Soda Bread with Currants is the kind of recipe that makes you feel like a baking genius with almost zero effort. I’ve tested this exact formula about a dozen times—through humid summers and dry winters, with different flours and different milks—and it never fails. Here’s why this one is different:
- Quick & Easy: From mixing bowl to oven in under 10 minutes. No kneading, no rising, no waiting around. It’s practically instant gratification.
- Simple Ingredients: You probably have everything in your pantry right now. Flour, baking soda, salt, buttermilk, and currants. That’s it. No yeast, no eggs, no complicated shopping list.
- Perfect for Any Occasion: Great for St. Patrick’s Day, sure, but also for lazy Sunday mornings, soup-soaking weeknights, or when you just want the house to smell amazing.
- Crowd-Pleaser: I’ve brought this to brunches, potlucks, and casual dinner parties. People always ask for the recipe. Kids love it toasted with butter. Adults love it with a sharp cheddar.
- Unbelievably Delicious: The texture is what gets me every time—a crisp, crackly crust giving way to a tender, slightly dense crumb studded with sweet, chewy currants. It’s comfort in bread form.
What makes this version different from all the others? It’s the ratio. I spent weeks tweaking the flour-to-buttermilk balance until I got that perfect interior—not too dry, not too gummy. And the currants? I plump them briefly in hot water before mixing, which keeps them from drying out during baking. It’s a tiny step, but it makes a world of difference. This isn’t just another soda bread recipe—it’s the one I keep coming back to, the one I’ve memorized, the one that makes me close my eyes after the first bite every single time.
What Ingredients You Will Need
This recipe uses simple, wholesome ingredients to deliver bold flavor and satisfying texture without any fuss. Most of these are pantry staples, which is exactly why this bread is so reliable when you need it most.
- All-purpose flour (3 cups / 375g) – The backbone of the bread. I use unbleached all-purpose flour for the best texture. King Arthur Flour is my go-to, but any brand works. Avoid bread flour here—it makes the bread too tough.
- Baking soda (1 teaspoon) – This is your leavening agent. Make sure it’s fresh! Old baking soda won’t give you the rise you want. Test it by dropping a pinch into vinegar—if it fizzes vigorously, you’re good.
- Salt (1 teaspoon) – Don’t skip this. Salt isn’t just for flavor—it strengthens the gluten structure and balances the tanginess of the buttermilk. Use fine sea salt for even distribution.
- Granulated sugar (2 tablespoons / 25g) – Just a touch to round out the flavors. It doesn’t make the bread sweet, but it brings out the natural sweetness of the flour and currants. You can leave it out if you prefer a more savory loaf.
- Cold butter (3 tablespoons / 42g, cut into small cubes) – This is optional but highly recommended. The butter adds richness and tenderness to the crumb. If you’re dairy-free, you can use a solid vegan butter or skip it entirely—the bread will just be a bit denser.
- Buttermilk (1 ½ cups / 360ml) – The magic ingredient. The acidity in buttermilk reacts with the baking soda to create lift, and it gives the bread its signature tangy flavor. If you don’t have buttermilk, you can make a quick substitute: add 1 ½ tablespoons of lemon juice or white vinegar to a measuring cup, then fill with regular milk to the 1 ½ cup line. Let it sit for 5 minutes until it curdles.
- Dried currants (¾ cup / 110g) – These little gems add pockets of sweetness throughout the bread. I prefer Zante currants for their tiny size and intense flavor. You can substitute raisins, dried cranberries, or chopped dried apricots if you prefer. Pro tip: soak the currants in hot water for 10 minutes before using, then drain well. This plumps them up and prevents them from stealing moisture from the dough during baking.
Equipment Needed
The beauty of this recipe is that it doesn’t require any fancy equipment. Here’s what you’ll need:
- Large mixing bowl – Any bowl works, but I prefer a wide, heavy one for easy mixing.
- Whisk or fork – For combining the dry ingredients.
- Pastry cutter or two knives – To cut the butter into the flour. If you don’t have a pastry cutter, you can use your fingertips—just work quickly so the butter doesn’t warm up too much.
- Rubber spatula or wooden spoon – For mixing the dough. A spatula works best for scraping the sides.
- Bench scraper or sharp knife – For scoring the cross on top. A serrated knife works beautifully.
- Baking sheet – Line it with parchment paper for easy cleanup. I’ve used both a sheet pan and a cast iron skillet—both work, but the skillet gives a slightly crisper bottom crust.
- Cooling rack – Essential for letting the bread cool evenly. If you don’t have one, you can prop the loaf up on its side, but a rack is better.
I’ve made this bread with a cheap baking sheet from the grocery store and a high-end one from a kitchen supply shop—honestly, the results were nearly identical. Don’t overthink the tools. Your hands and a bowl are really all you need.
Preparation Method
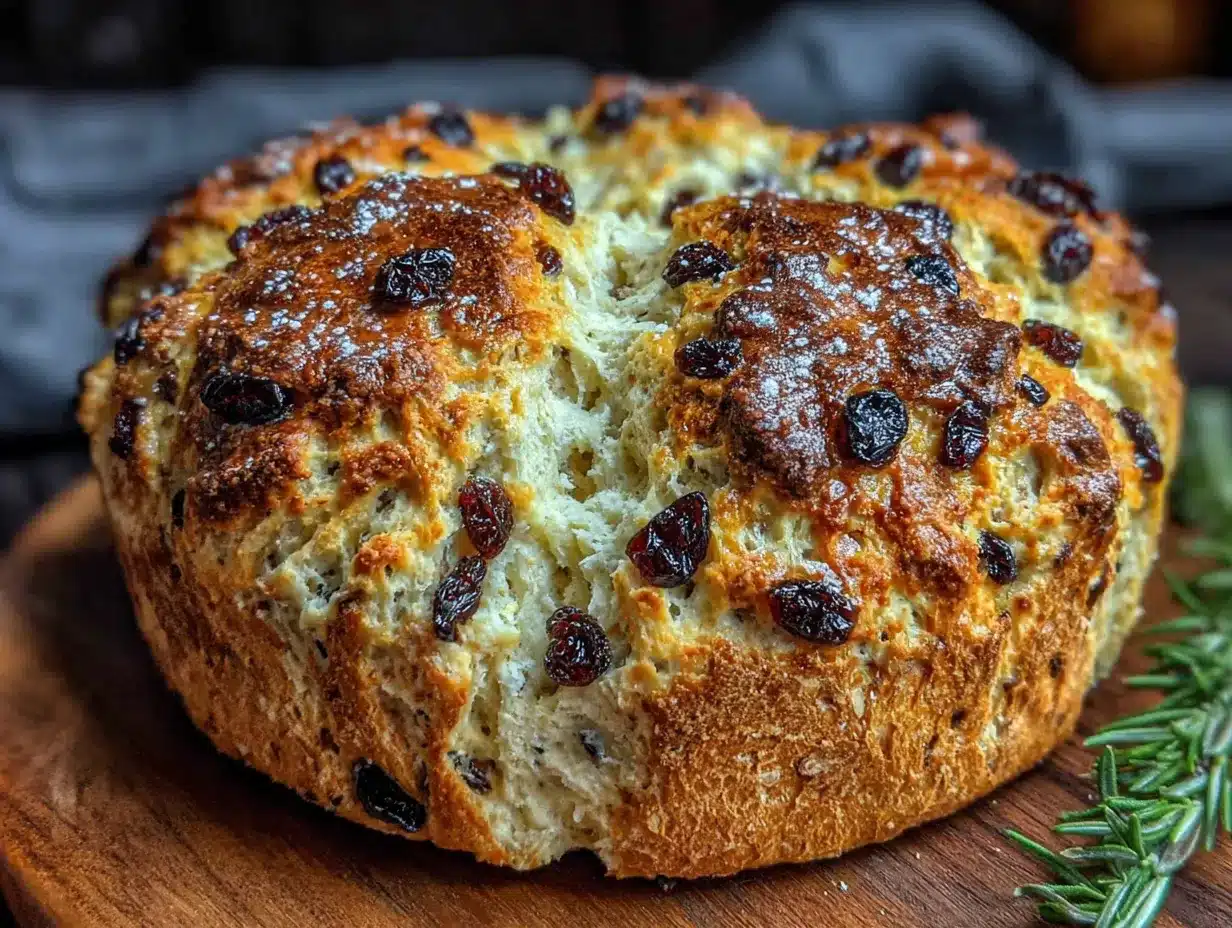
Let’s make some bread. Set a timer for 10 minutes—that’s how long the active work takes. The rest is just waiting for the oven to do its thing.
- Preheat your oven to 400°F (200°C). Position a rack in the center of the oven. Line a baking sheet with parchment paper. If you’re using a cast iron skillet, place it in the oven while it preheats so it gets hot.
- Soak the currants. Place the dried currants in a small bowl and cover them with hot tap water. Let them sit while you prepare the dough. This step is non-negotiable in my kitchen—it makes the currants plump and juicy instead of dry and hard. Drain them well before adding to the dough.
- Whisk the dry ingredients. In your large mixing bowl, whisk together the 3 cups of all-purpose flour, 1 teaspoon of baking soda, 1 teaspoon of salt, and 2 tablespoons of sugar. Make sure everything is evenly distributed—you don’t want a pocket of baking soda in your final loaf.
- Cut in the butter. Add the cold, cubed butter to the flour mixture. Using a pastry cutter or your fingertips, work the butter into the flour until it resembles coarse crumbs with some pea-sized butter pieces remaining. This should take about 1-2 minutes. Don’t overwork it—those little butter bits create flaky pockets in the bread.
- Add the currants. Drain the soaked currants and pat them dry with a paper towel. Toss them into the flour mixture, making sure they’re coated in flour. This prevents them from sinking to the bottom of the loaf during baking.
- Make a well and add the buttermilk. Create a well in the center of the flour mixture. Pour in the 1 ½ cups of buttermilk all at once. Using a rubber spatula or wooden spoon, stir until the dough just comes together. It will look shaggy and slightly sticky—this is exactly what you want. Don’t overmix, or the bread will be tough. A few streaks of flour are fine.
- Shape the dough. Lightly flour your hands and turn the dough out onto a floured surface. Gently bring the dough together into a round shape. Don’t knead it—just fold it over itself a couple of times to create a smooth top. The dough should be soft and slightly tacky, not dry. If it’s too sticky to handle, add a tablespoon more of flour.
- Place on the baking sheet. Transfer the dough round to your prepared baking sheet. Using a sharp knife or bench scraper, cut a deep cross into the top of the loaf, about ½ inch deep. This isn’t just for looks—the cross helps the bread bake evenly by allowing heat to penetrate the center. It’s also tradition, said to let the fairies out. I’m not one to argue with folklore.
- Bake for 35-40 minutes. Place the bread in the preheated oven. Bake until the crust is deep golden brown and the loaf sounds hollow when tapped on the bottom. If you have an instant-read thermometer, the internal temperature should reach 190°F (88°C). About halfway through, you can rotate the pan for even browning.
- Cool on a wire rack. Transfer the bread to a cooling rack. Resist the urge to slice into it immediately—I know, it’s hard. Let it cool for at least 20 minutes. The interior continues to set as it cools, and slicing too early can result in a gummy texture.
A quick note: if your bread is browning too quickly on top but isn’t done in the center, tent it loosely with aluminum foil for the last 10 minutes of baking. This happened to me once when I forgot to rotate the pan—the foil saved the day.
Cooking Tips & Techniques
I’ve made this bread probably thirty times by now, and I’ve learned a few things the hard way. Let me save you the trouble.
The buttermilk matters. I know I said you can substitute, but real buttermilk gives the best flavor and texture. The cultured kind you find in the dairy aisle is thick, tangy, and reacts perfectly with the baking soda. If you use the milk-and-vinegar hack, let it sit for a full 10 minutes to properly acidify. I once rushed it and ended up with a flat loaf that tasted faintly of vinegar. Not my finest moment.
Don’t overmix the dough. This is the most common mistake. Soda bread is not yeast bread—you’re not developing gluten here. Overmixing makes the bread tough and dense. Mix just until the flour is incorporated. A few dry patches are fine. Trust the process.
Cold butter is your friend. I cannot stress this enough. Warm butter will melt into the flour instead of creating those little pockets of fat that make the crumb tender. If your kitchen is warm, pop the butter in the freezer for 5 minutes before cutting it in.
Score deeply enough. That cross on top isn’t just decorative. If you only score the surface, the bread will crack along the sides instead of along your cut. I learned this the first time I made it—my loaf looked like it had been through a minor earthquake. A deep, confident slash gives you that beautiful, rustic top.
Let it cool. I know the smell is intoxicating. I know you want a warm slice with butter. But cutting into hot bread compresses the crumb and makes it gummy. Give it at least 20 minutes. Use that time to make tea or find your favorite jam.
Multitasking strategy: While the bread bakes, you can prep your soup or stew to serve with it. This bread is fantastic alongside a bowl of hearty vegetable soup or a creamy potato leek soup. The timing works out perfectly—the bread rests while the soup simmers.
Variations & Adaptations
This recipe is wonderfully flexible. Here are some variations I’ve tried and loved:
- Savory Herb Version: Omit the sugar and currants. Add 1 tablespoon of fresh rosemary (chopped), 1 teaspoon of fresh thyme leaves, and ½ teaspoon of black pepper to the flour mixture. The result is a fragrant, savory loaf that’s incredible with roasted meats or dipped in olive oil. I made this for a friend’s dinner party, and it disappeared faster than the main course.
- Whole Wheat Option: Substitute 1 cup of the all-purpose flour with whole wheat flour. The bread will be denser and nuttier. Add an extra 2 tablespoons of buttermilk since whole wheat flour absorbs more liquid. I love this version for breakfast—toasted with a little honey.
- Gluten-Free Adaptation: Use a 1:1 gluten-free baking flour blend (I like Bob’s Red Mill). Add 1 teaspoon of xanthan gum if your blend doesn’t already include it. The texture will be slightly more crumbly, but the flavor is still wonderful. My gluten-intolerant neighbor gave this a thumbs up, which felt like a major victory.
- Dairy-Free Version: Use a dairy-free milk alternative (unsweetened oat or almond milk) mixed with 1 ½ tablespoons of lemon juice to create a buttermilk substitute. Use vegan butter or coconut oil in place of the butter. The bread won’t be quite as tender, but it’s still delicious.
- Add-Ins: Beyond currants, try chopped dried figs, diced dried apricots, or even dark chocolate chips for a sweeter version. I once added orange zest and dried cranberries for a holiday-inspired loaf—it was a hit at a Christmas brunch.
My personal favorite variation? I add ½ teaspoon of caraway seeds to the dough along with the currants. It’s a classic Irish combination, and the slight anise flavor pairs beautifully with the tangy buttermilk. Just don’t tell my grandmother—she’d say I’m messing with tradition.
Serving & Storage Suggestions
This bread is best served warm, but it’s still wonderful at room temperature. Here’s how to make the most of it:
Serving: Slice into thick wedges and serve with generous amounts of salted butter. The contrast between the crisp crust and the soft, buttery interior is pure magic. For a more indulgent treat, try it with Irish butter (Kerrygold is my favorite) and a drizzle of honey. It’s also fantastic with sharp cheddar cheese, smoked salmon, or a bowl of hearty soup. For brunch, serve it alongside scrambled eggs and crispy bacon.
Storage: Store the bread in a paper bag or wrapped in a clean kitchen towel at room temperature for up to 2 days. Do not store it in plastic—the crust will become soggy and sad. If you live in a humid climate (I feel your pain), you can store it in a bread box or loosely wrapped in foil. The bread is best on day one, but it makes excellent toast on day two.
Freezing: This bread freezes beautifully. Wrap the completely cooled loaf tightly in plastic wrap, then in a layer of aluminum foil. Freeze for up to 3 months. To thaw, leave it at room temperature for a few hours, then reheat in a 350°F oven for 10 minutes to restore the crust’s crispness.
Reheating: For individual slices, pop them in the toaster. For the whole loaf, wrap it in foil and warm it in a 350°F oven for 10-15 minutes. The crust will crisp up nicely. I’ve also been known to microwave a slice for 15 seconds in a pinch—it’s not the same, but it works when you need a bread fix fast.
Flavor development: Interestingly, the flavor of this bread actually improves slightly after a day. The tanginess of the buttermilk mellows, and the currants’ sweetness becomes more pronounced. If you can resist eating it all on day one, day two’s toast with butter is a revelation.
Nutritional Information & Benefits
Here’s an estimated nutritional breakdown per slice (based on 8 slices per loaf):
| Nutrient | Amount per slice |
|---|---|
| Calories | 245 |
| Total Fat | 6g |
| Saturated Fat | 3.5g |
| Cholesterol | 15mg |
| Sodium | 420mg |
| Total Carbohydrates | 42g |
| Dietary Fiber | 2g |
| Sugars | 10g |
| Protein | 6g |
This bread offers some surprising nutritional benefits. The currants are packed with antioxidants and iron, while the buttermilk provides calcium and probiotics (if you use live cultured buttermilk). The whole wheat variation adds fiber and B vitamins. It’s not health food, but it’s real food—made from simple ingredients without preservatives or additives. That counts for something in my book.
Dietary considerations: This recipe is vegetarian. For a vegan version, use the dairy-free adaptations mentioned above. It contains gluten and dairy in its standard form. The sugar content is moderate, coming mainly from the currants and the small amount of added sugar.
I personally love that this bread gives me permission to enjoy a carb-heavy meal without guilt. It’s satisfying in a way that processed bread just isn’t. One slice is enough—it’s dense and filling, so you don’t need to eat half the loaf to feel full. Well, most of the time.
Conclusion
This Easy Rustic Irish Soda Bread with Currants has become a staple in my kitchen for good reason. It’s forgiving, it’s fast, and it delivers that deep, soul-satisfying feeling of homemade bread without the fuss of yeast and rising times. Whether you’re a seasoned baker or someone who’s never made bread from scratch, this recipe is for you.
I love that this bread doesn’t try to be anything other than what it is: a humble, honest loaf that tastes like comfort. It’s the bread I make when I need to feel grounded, when I want the house to smell like home, or when I just need something warm to eat with butter at 11 PM on a rainy Thursday. And honestly? That’s enough.
Now I want to hear from you. Have you tried making Irish soda bread before? Did you add your own twist? Drop a comment below and let me know how it turned out. And if you have a favorite way to serve it—with soup, with cheese, or just slathered in butter—I want to hear about that too. Happy baking, friends.
Frequently Asked Questions
Can I use raisins instead of currants?
Absolutely. Currants are smaller and have a slightly more intense, tangy flavor, but raisins work beautifully. If using raisins, I recommend soaking them in hot water first, just like the currants, to plump them up. Chop large raisins in half if you want them distributed more evenly throughout the dough.
Why did my soda bread turn out dense and heavy?
This usually happens for one of three reasons: overmixing the dough, using old baking soda, or not enough buttermilk. Overmixing develops gluten, which makes the bread tough. Always check that your baking soda is fresh (it should fizz when mixed with vinegar). And make sure your dough is moist enough—it should be shaggy and slightly sticky, not dry.
Can I make this bread without buttermilk?
Yes. Make a quick buttermilk substitute by adding 1 ½ tablespoons of lemon juice or white vinegar to a measuring cup, then filling with regular milk to the 1 ½ cup line. Let it sit for 5-10 minutes until it curdles and thickens. It won’t be quite as tangy, but it will still react with the baking soda to give you a good rise.
How do I know when the bread is fully baked?
The best test is the hollow sound test: tap the bottom of the loaf, and it should sound hollow. You can also use an instant-read thermometer—the internal temperature should reach 190°F (88°C). The crust should be deep golden brown, and a skewer inserted into the center should come out clean or with a few moist crumbs.
Can I double this recipe?
Yes, but I recommend making two separate loaves rather than one giant one. The baking time will be similar, but a larger loaf may need extra time in the oven and might not bake evenly. Plus, two smaller loaves are perfect for sharing—one to eat now, one to freeze for later.
Pin This Recipe!
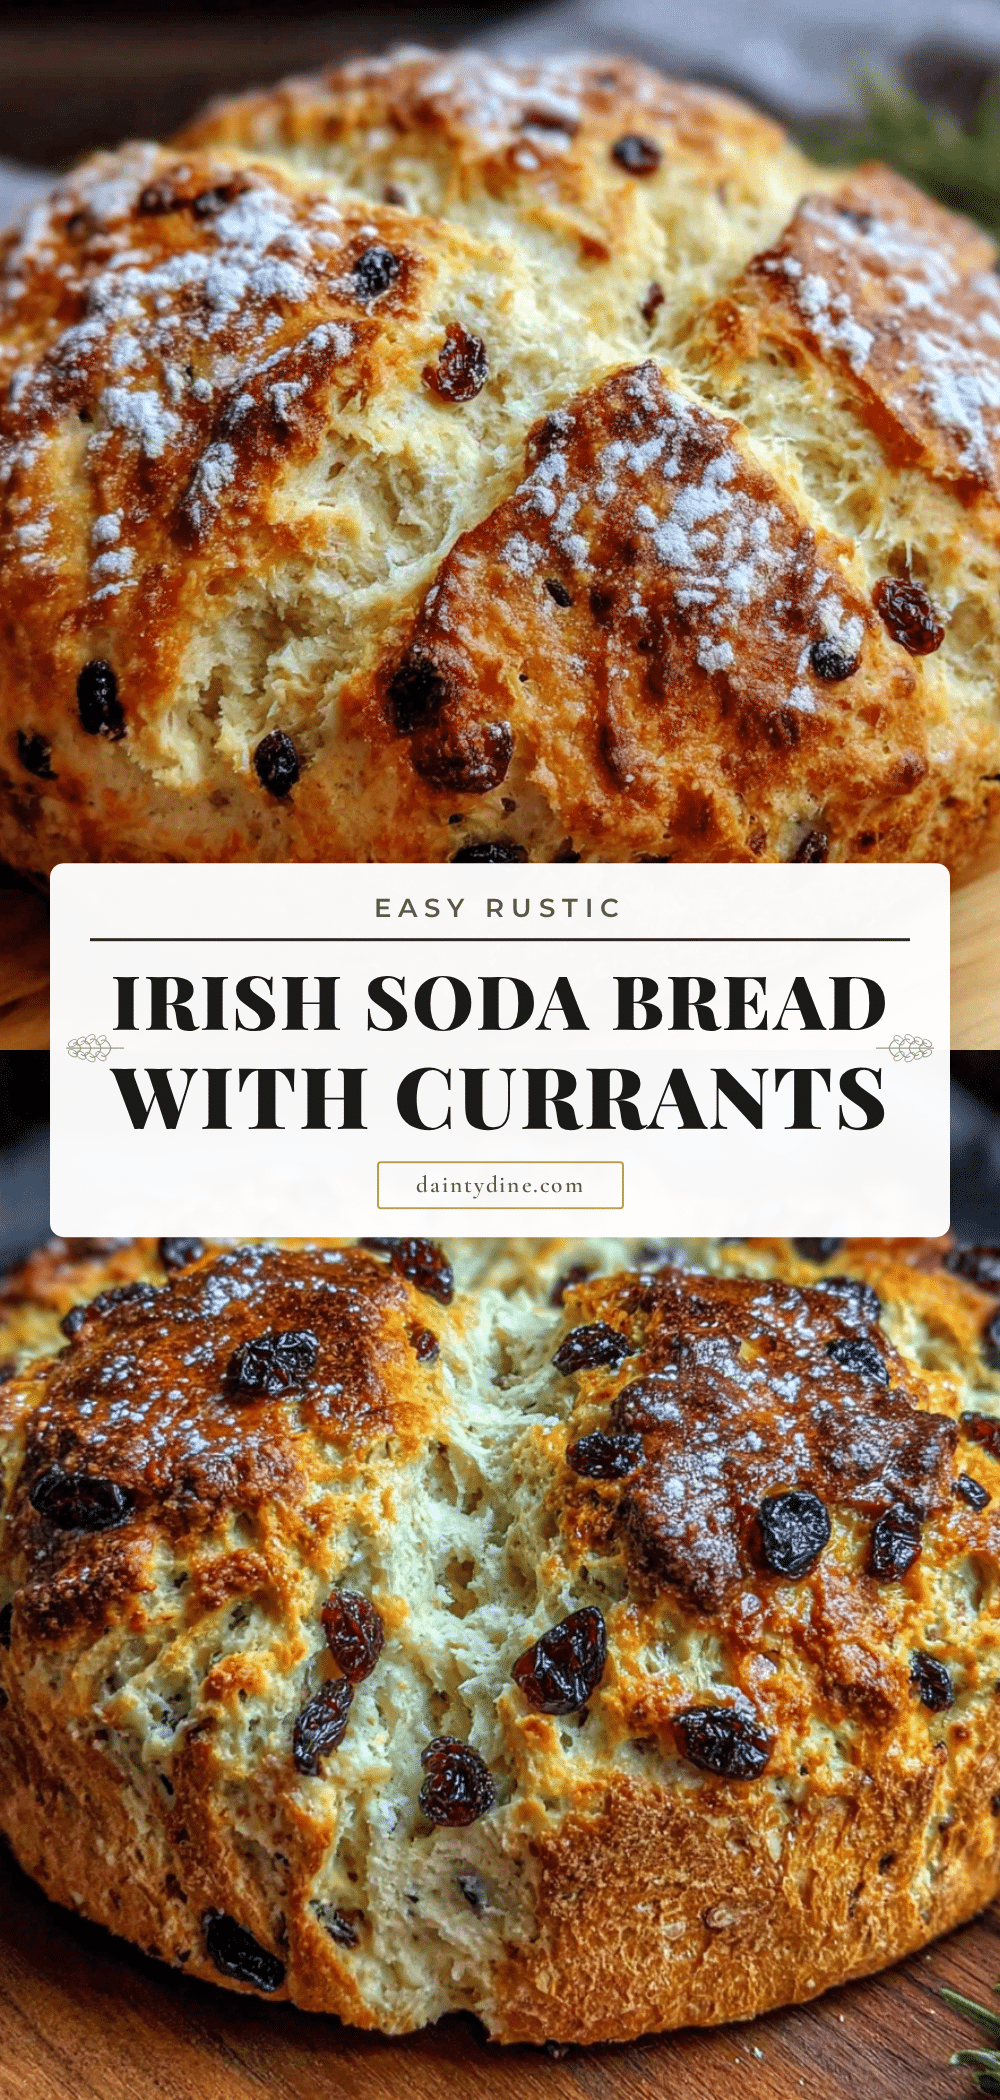
Easy Rustic Irish Soda Bread with Currants (4 Ingredients)
This easy rustic Irish soda bread with currants is a quick, no-yeast bread that comes together in under 10 minutes. With a crisp crust and tender crumb studded with sweet currants, it’s perfect for any occasion.
- Prep Time: 10 minutes
- Cook Time: 35-40 minutes
- Total Time: 45-50 minutes
- Yield: 8 servings 1x
- Category: Bread
- Cuisine: Irish
Ingredients
- 3 cups (375g) all-purpose flour
- 1 teaspoon baking soda
- 1 teaspoon salt
- 2 tablespoons (25g) granulated sugar
- 3 tablespoons (42g) cold butter, cut into small cubes
- 1 ½ cups (360ml) buttermilk
- ¾ cup (110g) dried currants
Instructions
- Preheat your oven to 400°F (200°C). Position a rack in the center of the oven. Line a baking sheet with parchment paper.
- Place the dried currants in a small bowl and cover them with hot tap water. Let them sit while you prepare the dough.
- In a large mixing bowl, whisk together the flour, baking soda, salt, and sugar.
- Add the cold, cubed butter to the flour mixture. Using a pastry cutter or your fingertips, work the butter into the flour until it resembles coarse crumbs with some pea-sized butter pieces remaining.
- Drain the soaked currants and pat them dry with a paper towel. Toss them into the flour mixture, making sure they’re coated in flour.
- Create a well in the center of the flour mixture. Pour in the buttermilk all at once. Using a rubber spatula or wooden spoon, stir until the dough just comes together. It will look shaggy and slightly sticky.
- Lightly flour your hands and turn the dough out onto a floured surface. Gently bring the dough together into a round shape. Don’t knead it—just fold it over itself a couple of times to create a smooth top.
- Transfer the dough round to your prepared baking sheet. Using a sharp knife or bench scraper, cut a deep cross into the top of the loaf, about ½ inch deep.
- Bake for 35-40 minutes, until the crust is deep golden brown and the loaf sounds hollow when tapped on the bottom. The internal temperature should reach 190°F (88°C).
- Transfer the bread to a cooling rack. Let it cool for at least 20 minutes before slicing.
Notes
For best results, use fresh baking soda and real buttermilk. Soak currants in hot water for 10 minutes before using to plump them up. Do not overmix the dough. Let the bread cool for at least 20 minutes before slicing to avoid a gummy texture.
Nutrition
- Serving Size: 1 slice
- Calories: 245
- Sugar: 10
- Sodium: 420
- Fat: 6
- Saturated Fat: 3.5
- Carbohydrates: 42
- Fiber: 2
- Protein: 6
Keywords: Irish soda bread, currant bread, quick bread, no yeast bread, rustic bread, St. Patrick's Day


