Love this? Save it for later!
Share the inspiration with your friends
There used to be a tiny pizzeria tucked between a dry cleaner and a thrift store on Main Street that made the most incredible little pizza rolls. When they closed abruptly two Octobers ago—just packed up and vanished overnight—I actually stood outside their locked door like a fool, peering through the window. I know, dramatic, right? But those little crispy, cheesy bundles of joy were my go-to after long days, and I’d never found anything that came close.
After six attempts—some burnt, some soggy, one that my kids politely called “interesting”—I finally cracked the code. And wouldn’t you know it, the secret was way simpler than I thought. I was overcomplicating the dough, overthinking the cheese, and completely missing the fun factor. That’s when the idea hit me: what if I turned them into mummies? Halloween was coming, my kids were bouncing off the walls with sugar-fueled excitement, and I needed something quick that wouldn’t leave me scrubbing dishes until midnight.
These Quick Mummy Pizza Bites are my little victory lap. They’re exactly what that pizzeria made—crispy on the outside, gooey on the inside—but with a Halloween twist that makes them ten times more fun. Honestly, the first time I pulled a tray of these little guys out of the oven, with their tiny pepperoni eyes staring back at me, I actually laughed out loud. Maybe you’ve been there—that moment when a recipe just clicks and you feel like you’ve won the kitchen lottery. That’s this recipe.
And the best part? You don’t need any fancy ingredients or hours of prep. We’re talking about 20 minutes from start to finish, minimal mess, and a snack that disappears faster than I can make it. Let me show you how to bring a little pizzeria magic back into your kitchen—with a spooky twist.
Why You’ll Love This Recipe
Look, I’ve tested a lot of Halloween recipes over the years. Some are adorable but take three hours. Others are quick but look like a sad science experiment. These Quick Mummy Pizza Bites hit that sweet spot where cute meets practical. Here’s why they’ve become my go-to for every Halloween gathering:
- Ready in Under 20 Minutes : From fridge to table in about 18 minutes flat. That’s faster than ordering delivery and way more satisfying. Perfect for those evenings when the kids announce they need treats for the school party tomorrow morning.
- Simple Ingredients : You probably have everything in your kitchen right now. Refrigerated pizza dough, mozzarella, pepperoni, and a jar of marinara. No special trips to the store for obscure ingredients you’ll never use again.
- Perfect for Halloween Parties : These little mummies are the life of any Halloween spread. Kids go absolutely bonkers for them, and adults sneak them when they think nobody’s watching. I’ve seen a tray of these disappear in under five minutes at a neighborhood gathering.
- Crowd-Pleaser : Picky eaters? No problem. My nephew who “doesn’t like anything” ate six of these in one sitting. The pizza flavor is familiar and comforting, while the mummy design adds just enough novelty to make them exciting.
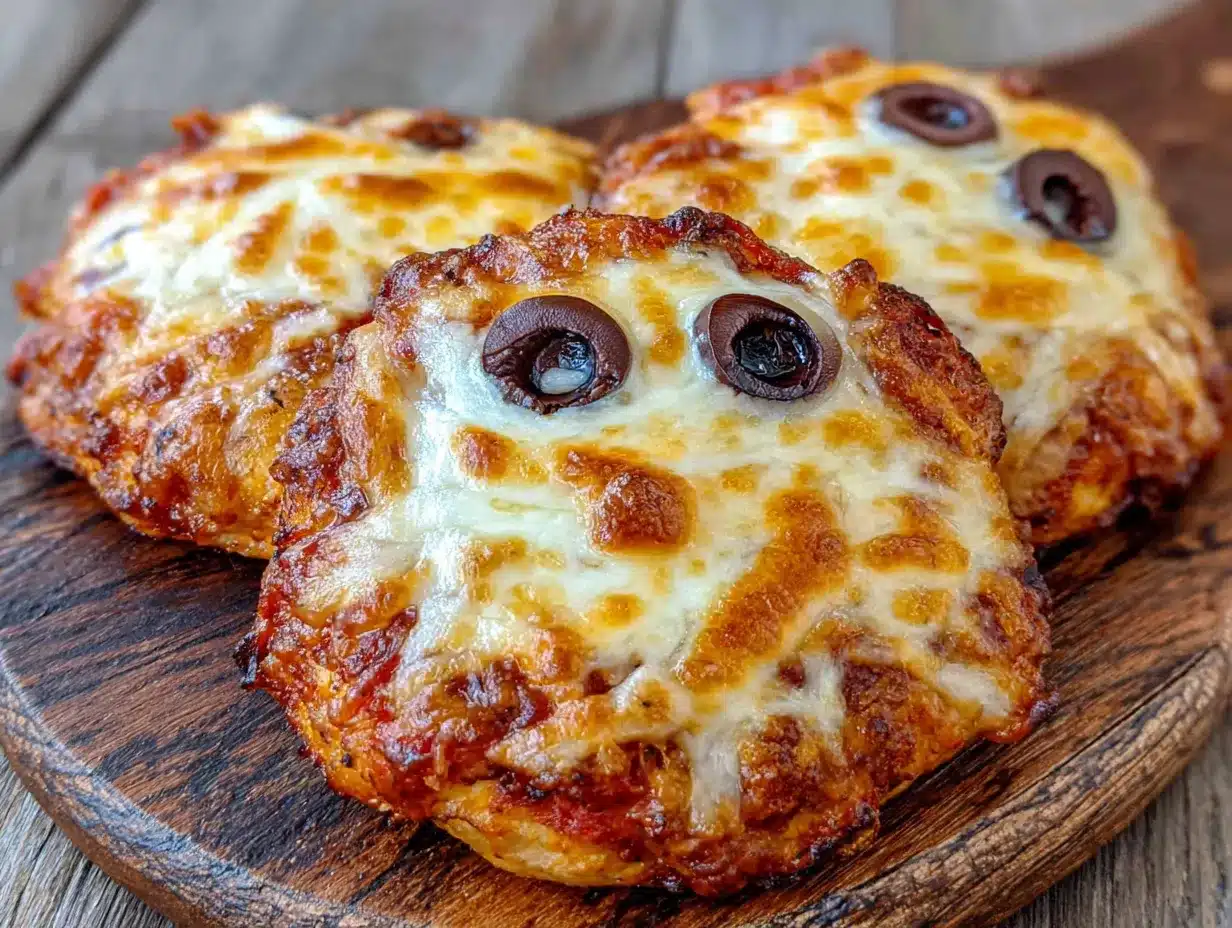
- Unbelievably Delicious : The texture is what gets me every time. The dough gets golden and slightly crispy on the outside, while the inside stays soft and pillowy. The cheese gets all melty and stretchy, and the pepperoni adds that salty, smoky kick. It’s comfort food at its finest.
What makes these different from every other Halloween snack out there? It’s the wrapping technique. Instead of struggling with complicated dough strips that break apart, I’ve found a method that creates perfect mummy wraps every single time. No frustration, no dough disasters—just cute, delicious mummies that look like you spent way more effort than you actually did.
This recipe isn’t just good—it’s the kind that makes you close your eyes after the first bite. That warm, cheesy, slightly greasy pizza perfection that hits every comfort food craving. It’s Halloween fun without the Halloween hassle. And honestly, on a busy weeknight in October, that’s exactly what we all need.
What Ingredients You Will Need
This recipe uses simple, everyday ingredients to create something that looks way more complicated than it actually is. Here’s what you’ll need to bring these little mummies to life:
For the Pizza Bites
- 1 can (13.8 oz) refrigerated pizza dough — I prefer Pillsbury classic pizza crust for consistent results. It’s forgiving and rolls out evenly. If you’re feeling ambitious, homemade pizza dough works beautifully too, but let’s be real—on a weeknight, the canned stuff is a lifesaver.
- 8 ounces low-moisture mozzarella cheese — Cut into 1-inch cubes. The low-moisture kind melts beautifully without making the dough soggy. Fresh mozzarella works but can release too much water—stick with the block stuff for best results.
- 24 to 30 slices mini pepperoni — These become the mummy eyes. I like the mini size because they fit perfectly on the little bites. Regular pepperoni cut into quarters works too if that’s what you have.
- 1/2 cup pizza sauce or marinara — For dipping. Use your favorite jarred sauce or whip up a quick homemade version. I’m partial to Rao’s marinara for its rich flavor, but any good-quality sauce works.
- 1 tablespoon olive oil — For brushing on top. This helps the dough get golden and crispy. You can use melted butter instead for a richer flavor.
- 1/2 teaspoon garlic powder — Mixed into the olive oil for extra flavor. Optional but highly recommended.
- 1/2 teaspoon dried Italian seasoning — Also optional, but it adds that pizza parlor vibe. Mix it with the garlic oil or sprinkle it on top.
- Pinch of salt and black pepper — To taste. The pepperoni is already salty, so go easy.
For the Dipping Sauce
- 1/2 cup additional pizza sauce or marinara — Serve warm or at room temperature. You can also use ranch dressing for a creamy option, or garlic butter for something indulgent.
Ingredient Selection Tips : When choosing your pizza dough, look for a can that’s not expired and feels firm when you squeeze it. I once grabbed a dented can, and the dough was partially proofed—total disaster. For the cheese, block mozzarella is your friend. Pre-shredded cheese has anti-caking agents that affect melting. Trust me on this one—I learned the hard way after a batch of sad, lumpy mummies.
Substitution Guidance : If you’re dairy-free, use vegan mozzarella shreds and dairy-free pizza dough. For a gluten-free version, grab a gluten-free pizza dough mix and follow the package instructions. You can swap the pepperoni for sliced black olives or sun-dried tomatoes for a vegetarian option. The mummies will look a little different, but they’ll still be delicious.
Equipment Needed
You don’t need anything fancy for these Quick Mummy Pizza Bites. Here’s what I use every time:
- Baking sheet — A standard half-sheet pan works perfectly. Line it with parchment paper for easy cleanup. I’ve used foil in a pinch, but parchment gives better browning.
- Parchment paper — Non-negotiable for me. It prevents sticking and makes cleanup a breeze. If you’re out, use a silicone baking mat.
- Sharp knife or pizza cutter — For cutting the dough into strips. A pizza cutter is faster, but a knife works just fine. Make sure it’s sharp so you don’t drag the dough.
- Pastry brush — For brushing the olive oil mixture. A silicone brush is easy to clean. A paper towel works in a pinch, but you’ll get uneven coverage.
- Small bowl — For mixing the garlic oil. Any small dish works.
- Cutting board — For prepping the dough. Give it a light dusting of flour to prevent sticking.
- Measuring spoons — For the oil and seasonings. Eyeballing it works too, but I like to be precise.
Budget-Friendly Options : Don’t have a pastry brush? Use a clean, unused paintbrush from the hardware store—just make sure it’s never been used for paint! No pizza cutter? A sharp knife does the job. No baking sheet? A cast-iron skillet works, though you’ll need to work in batches.
Preparation Method
Alright, let’s make some mummies! I’ve broken this down into simple steps so you don’t miss anything. Trust the process, and you’ll have a tray of adorable pizza mummies in no time.
- Preheat your oven to 400°F (200°C). Line a baking sheet with parchment paper. Getting the oven hot before you start is key—you want that immediate burst of heat to crisp up the dough.
- Prepare the garlic oil. In a small bowl, mix 1 tablespoon olive oil with 1/2 teaspoon garlic powder and 1/2 teaspoon Italian seasoning. Set aside. This is your magic potion for golden, flavorful mummies.
- Roll out the pizza dough. On a lightly floured surface, unroll the pizza dough. If it’s in a can, let it relax for a few minutes if it keeps springing back. Use a rolling pin to gently stretch it into a rectangle about 12×8 inches. Don’t stress about perfection—mummies are supposed to look a little rough, right?
- Cut the dough into strips. Using a sharp knife or pizza cutter, cut the dough lengthwise into strips about 1/2-inch wide. You’ll get about 12 to 14 strips. These will become the mummy wrappings. If the strips are uneven, that’s fine—it adds character.
- Cut the cheese. Take your mozzarella block and cut it into 1-inch cubes. You want about 12 cubes total. Each cube will be the center of one mummy. If you have extra, make a few more mummies—nobody ever complained about too much cheese.
- Wrap the mummies. Here’s where the magic happens. Take one cheese cube and place it at one end of a dough strip. Wrap the dough strip around the cheese, overlapping slightly as you go, like you’re bandaging a tiny, delicious patient. Leave a small gap near the top for the eyes. Don’t wrap too tightly—the cheese needs room to expand as it melts. Repeat with all the cheese cubes.
- Place on the baking sheet. Arrange the wrapped mummies on the prepared baking sheet, leaving about 2 inches between each one. They’ll expand a bit as they bake, so give them some breathing room.
- Brush with garlic oil. Using your pastry brush, gently brush each mummy with the garlic oil mixture. This is what gives them that beautiful golden color and crispy texture. Don’t skip this step—it makes a huge difference.
- Add the eyes. Press two mini pepperoni slices into the exposed cheese gap on each mummy. Position them close together for a cute look, or farther apart for a derpy mummy. I like to vary it—some cute, some silly. It makes the tray more fun.
- Bake for 10-12 minutes. Pop the tray in the preheated oven and bake until the dough is golden brown and the cheese is bubbly. Keep an eye on them after 10 minutes—ovens vary, and you don’t want burnt mummies. The pepperoni eyes will get slightly crispy, which is perfect.
- Let them cool slightly. Remove the baking sheet from the oven and let the mummies cool for 2-3 minutes. The cheese inside is molten hot and will burn your mouth if you dive in too fast. Trust me, I’ve made that mistake. Twice.
- Serve with warm pizza sauce. While the mummies cool, warm up your dipping sauce in the microwave or on the stovetop. Arrange the mummies on a platter with the sauce in the center. Watch them disappear.
Pro Tip : If the dough strips stick to your cutting board, sprinkle a little more flour underneath. Sticky dough is the enemy of cute mummies. Also, if your cheese starts leaking out during baking (it happens), don’t panic—just call them “zombie mummies” and move on. Nobody will know the difference.
Cooking Tips & Techniques
After making these Quick Mummy Pizza Bites more times than I care to count, I’ve picked up a few tricks that make the process smoother and the results better. Here’s what I wish someone had told me:
Don’t overwork the dough. Pizza dough is forgiving, but if you handle it too much, it gets tough. Roll it out gently, cut it cleanly, and wrap the cheese quickly. The less you mess with it, the flakier and lighter your mummies will be.
Temperature matters. Cold cheese wrapped in room-temperature dough works best. If your cheese is too cold, it won’t melt evenly. If your dough is too warm, it’ll be sticky and hard to work with. Let the dough sit at room temperature for about 10 minutes before rolling it out. Take the cheese out of the fridge at the same time.
Seal the ends. When you finish wrapping each mummy, pinch the end of the dough strip against the wrapped layers. This prevents it from unraveling during baking. It’s a small step that makes a big difference in presentation.
Watch the cheese. The first time I made these, I got distracted and left them in the oven too long. The cheese exploded out of the dough like a volcanic eruption. Now I set a timer for 10 minutes and check obsessively. When the dough is golden and the cheese is just starting to bubble, they’re done.
Batch baking tips. If you’re making a big batch for a party, bake them in batches on separate trays. Overcrowding the pan creates steam, which makes the dough soggy instead of crispy. Give those mummies some personal space.
My biggest failure? I once tried to make these with crescent roll dough. Big mistake. The dough is too delicate and doesn’t hold its shape. The mummies came out looking like sad, deflated ghosts. Stick with pizza dough—it’s sturdy enough to hold the cheese and forgiving enough for beginners.
Multitasking strategy: While the mummies are baking, warm up your dipping sauce and set up your serving platter. This way, everything is ready at the same time. I also like to prep the next batch while the first one bakes. Efficiency is key on a busy weeknight.
Variations & Adaptations
One of the best things about these Quick Mummy Pizza Bites is how easy they are to customize. Here are some variations I’ve tried and loved:
Spicy Mummy Bites
Add a pinch of red pepper flakes to the garlic oil before brushing. Use spicy pepperoni or add a small slice of jalapeño next to the cheese before wrapping. The heat cuts through the richness beautifully. My husband requests these every time.
Vegetarian Mummy Bites
Skip the pepperoni and use small slices of roasted red pepper or black olive for the eyes. You can also add a small cube of sun-dried tomato inside the wrap for extra flavor. They’re just as cute and way more colorful.
Cheese Explosion Mummies
Use a cube of mozzarella plus a small dollop of ricotta or cream cheese inside the wrap. The combination of melty mozzarella and creamy ricotta is next-level. Just be warned—they’re messier, but totally worth it.
Gluten-Free Mummies
Use a gluten-free pizza dough mix. Follow the package instructions for rolling and baking. The texture will be slightly different—a bit more crumbly—but the flavor is still fantastic. I’ve made these for my gluten-sensitive friend, and she devoured them.
Breakfast Mummies
Swap the pizza sauce for a drizzle of maple syrup and use breakfast sausage links cut into small pieces instead of pepperoni. The sweet and savory combo is surprisingly addictive. Perfect for a Halloween morning treat.
Dipping sauce variations : Beyond classic marinara, try ranch dressing, garlic aioli, buffalo sauce, or even a creamy sriracha mayo. Each one gives the mummies a completely different personality. My kids love ranch; I’m partial to the garlic aioli.
Serving & Storage Suggestions
These Quick Mummy Pizza Bites are best served warm, right out of the oven. The cheese is perfectly stretchy, the dough is crispy, and the pepperoni eyes are at their cutest. Arrange them on a platter around a small bowl of warm pizza sauce. For a Halloween party, add some fake spiderwebs or plastic spiders around the platter for extra spooky vibes.
Complementary dishes : Serve these alongside a simple green salad for a complete meal, or pair them with other Halloween snacks like “witches’ fingers” breadsticks or pumpkin-shaped cheese balls. For drinks, apple cider or a crisp lager cuts through the richness beautifully.
Storage instructions : If you have leftovers (unlikely, but possible), let them cool completely, then store them in an airtight container in the refrigerator for up to 3 days. The dough will soften slightly, but they’ll still be delicious.
Reheating tips : To bring back the crispiness, reheat them in a 350°F oven for 5-7 minutes. The microwave works in a pinch, but the dough will be chewy rather than crispy. I’ve also reheated them in an air fryer at 350°F for 3-4 minutes, and they came out almost as good as fresh.
Freezer instructions : You can freeze these before or after baking. To freeze unbaked mummies, arrange them on a baking sheet and freeze until solid, then transfer to a freezer bag. Bake from frozen, adding 2-3 minutes to the baking time. To freeze baked mummies, cool completely, then freeze in a single layer on a baking sheet before transferring to a freezer bag. Reheat directly from frozen.
Flavor development : Honestly, these are best fresh. The magic is in that first warm, crispy bite. But if you do have leftovers, they make a great lunch the next day. The flavors meld together a bit, and the dough takes on a softer, more bread-like texture. Not bad—just different.
Nutritional Information & Benefits
Let’s be real—these are a treat, not a health food. But here’s the approximate nutritional breakdown for one mummy bite (based on 12 servings):
- Calories : 140-160 per bite
- Protein : 7-8 grams
- Carbohydrates : 14-16 grams
- Fat : 7-8 grams
- Saturated Fat : 3-4 grams
- Sodium : 350-400 mg
- Calcium : 15% of daily value
Health benefits : The mozzarella provides a good amount of calcium and protein, which supports bone health and muscle repair. The tomato-based sauce is rich in lycopene, an antioxidant linked to heart health. And hey, the act of making these with your kids? That’s good for the soul.
Dietary considerations : This recipe contains gluten, dairy, and processed meats. For a dairy-free version, use vegan cheese. For gluten-free, use gluten-free pizza dough. For a lower-sodium option, use low-sodium pepperoni and reduce the added salt.
My personal perspective : I don’t make these every week, and I don’t pretend they’re a health food. But for a Halloween treat or a fun weeknight dinner? They hit the spot. Balance is everything—enjoy the mummies, then have a salad tomorrow. Life’s too short to stress over pepperoni.
Conclusion
These Quick Mummy Pizza Bites are proof that Halloween fun doesn’t have to be complicated or time-consuming. With just a few simple ingredients and 20 minutes, you can create something that brings genuine joy to your table. The kids will love the cute mummy design, you’ll love how easy they are, and everyone will love the warm, cheesy, pizza-flavored goodness.
I’ve made these for school parties, neighborhood gatherings, and lazy Halloween nights at home. Every single time, they’re the first thing to disappear. There’s something about that combination of familiar pizza flavor and playful presentation that just works. It’s comfort food with a costume.
So go ahead—raid your fridge, grab that can of pizza dough, and make some mummies. Don’t be afraid to get creative with the eyes or try different fillings. The best recipes are the ones you make your own. And if your mummies come out a little lopsided? Call them charming. I promise, nobody will care once they taste them.
Now I want to hear from you! Did you make these for a Halloween party? Did your kids help wrap the mummies? Did you come up with a fun variation I haven’t tried? Drop a comment below and share your mummy masterpiece. And if you loved this recipe, share it with a friend who needs a quick Halloween win. Happy Halloween, and happy cooking!
Frequently Asked Questions
Can I make these ahead of time for a party?
Absolutely! You can assemble the mummies up to 24 hours in advance. Just arrange them on the baking sheet, cover with plastic wrap, and refrigerate. Bake them right before serving for the best texture. If you’re really short on time, you can bake them a few hours ahead and reheat in a 350°F oven for 5 minutes.
Can I use homemade pizza dough instead of canned?
Yes, and it’s delicious! Homemade dough will give you a slightly chewier, more artisanal texture. Just make sure it’s rolled out thin enough—about 1/8-inch thick. You might need to adjust the baking time by a minute or two. I’ve used my go-to pizza dough recipe many times, and it works beautifully.
My cheese leaked out during baking. What did I do wrong?
Don’t worry, it happens to the best of us! This usually means the dough wasn’t wrapped tightly enough around the cheese, or the cheese cube was too large. Next time, make sure you’re overlapping the dough strips as you wrap, and try cutting the cheese into slightly smaller cubes. Also, make sure your oven is fully preheated—the quick blast of heat helps the dough set before the cheese starts melting.
Can I make these in an air fryer?
Yes! Air fryers work great for these mummies. Preheat your air fryer to 375°F, arrange the mummies in a single layer (don’t overcrowd), and cook for 6-8 minutes, flipping halfway through. They’ll come out extra crispy. You might need to work in batches, but it’s worth it for that texture.
How do I get the pepperoni eyes to stay in place?
Press the pepperoni slices gently into the cheese before baking. As the cheese melts, it will hold the pepperoni in place. If you’re worried about them sliding off, you can use a tiny dab of cream cheese or a speck of shredded mozzarella as “glue.” But honestly, even if they shift a little, it just makes the mummies look more characterful.
Pin This Recipe!
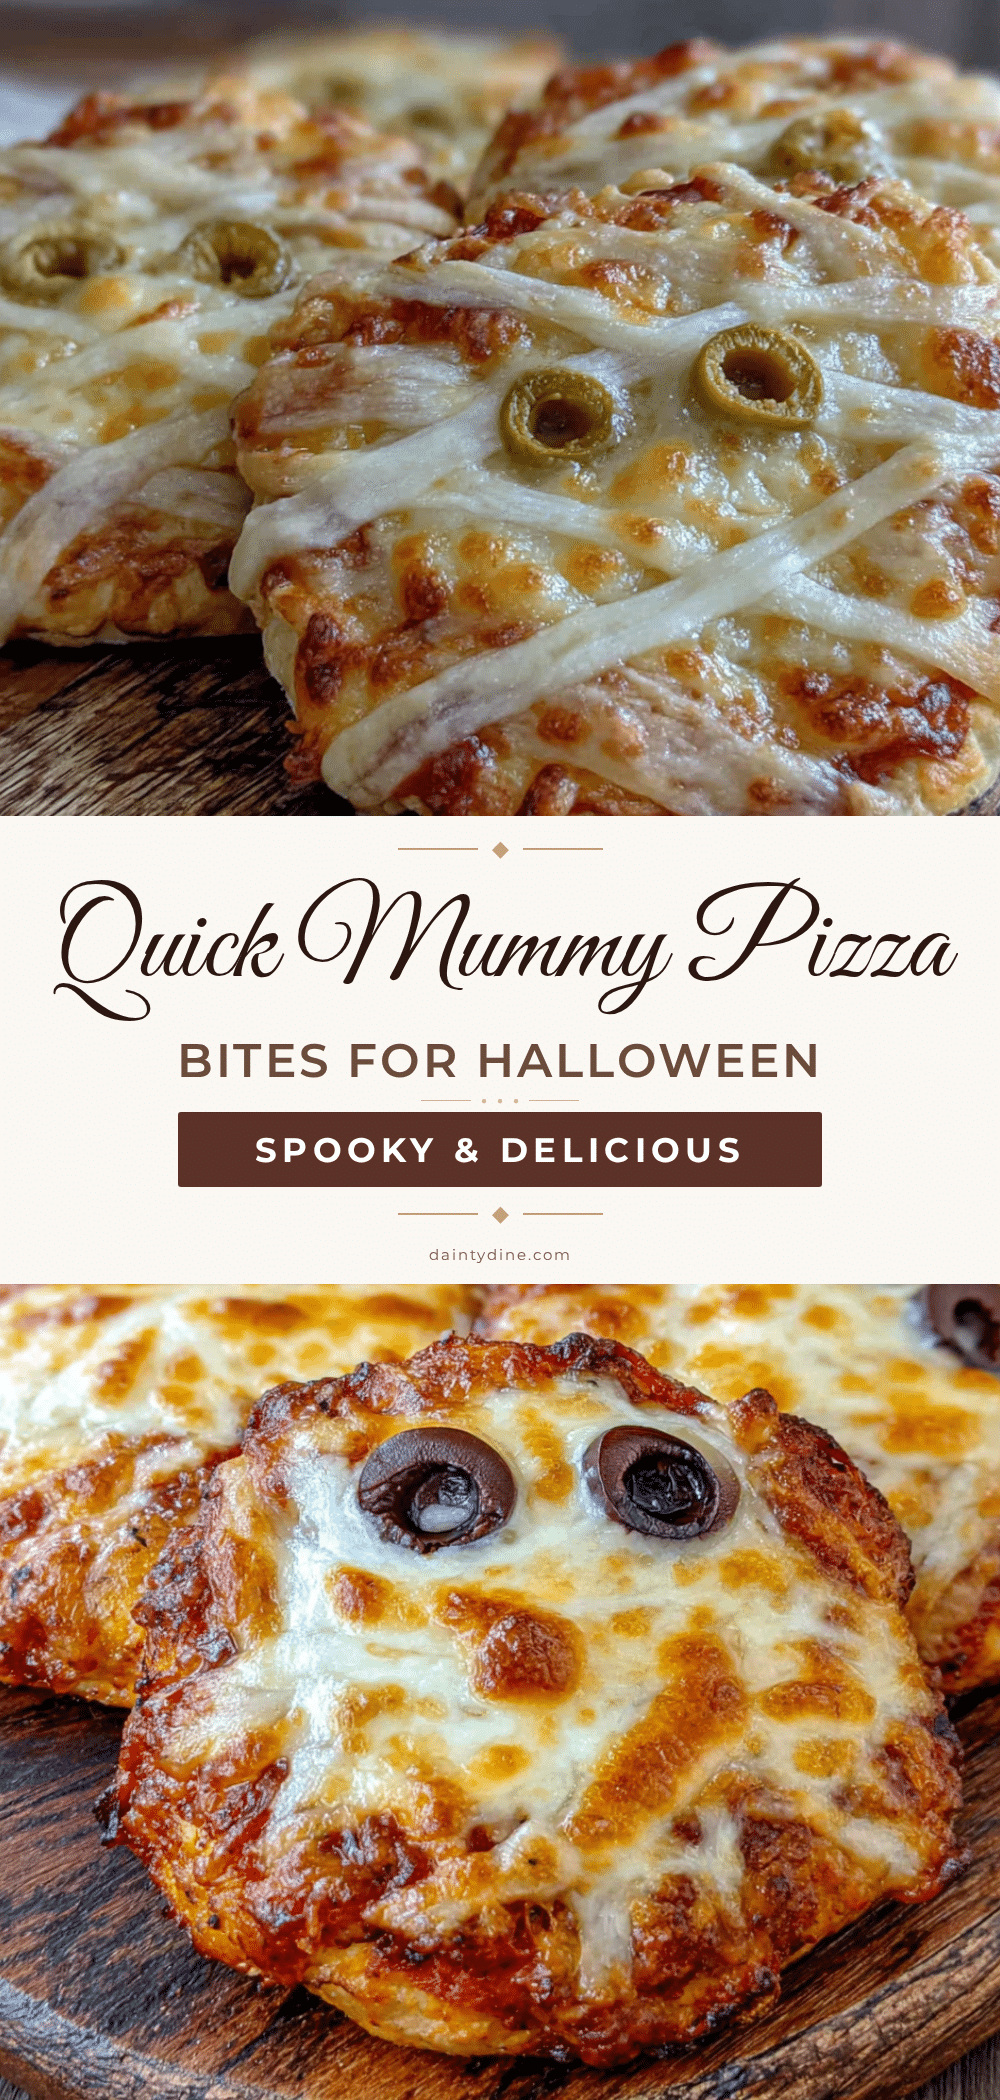
Quick Mummy Pizza Bites: Easy Halloween Recipe
These Quick Mummy Pizza Bites are a fun and easy Halloween snack made with refrigerated pizza dough, mozzarella cheese, and pepperoni. Ready in under 20 minutes, they’re perfect for parties and weeknight treats.
- Prep Time: 10 minutes
- Cook Time: 12 minutes
- Total Time: 22 minutes
- Yield: 12 servings 1x
- Category: Appetizer
- Cuisine: American
Ingredients
- 1 can (13.8 oz) refrigerated pizza dough
- 8 ounces low-moisture mozzarella cheese, cut into 1-inch cubes
- 24 to 30 slices mini pepperoni
- 1/2 cup pizza sauce or marinara (for dipping)
- 1 tablespoon olive oil
- 1/2 teaspoon garlic powder
- 1/2 teaspoon dried Italian seasoning
- Pinch of salt and black pepper
- 1/2 cup additional pizza sauce or marinara (for serving)
Instructions
- Preheat your oven to 400°F (200°C). Line a baking sheet with parchment paper.
- In a small bowl, mix 1 tablespoon olive oil with 1/2 teaspoon garlic powder and 1/2 teaspoon Italian seasoning. Set aside.
- On a lightly floured surface, unroll the pizza dough. Gently stretch it into a rectangle about 12×8 inches.
- Using a sharp knife or pizza cutter, cut the dough lengthwise into strips about 1/2-inch wide (about 12 to 14 strips).
- Cut the mozzarella block into 1-inch cubes (about 12 cubes).
- Place one cheese cube at one end of a dough strip. Wrap the dough strip around the cheese, overlapping slightly, leaving a small gap near the top for the eyes. Repeat with all cheese cubes.
- Arrange the wrapped mummies on the prepared baking sheet, leaving about 2 inches between each.
- Brush each mummy with the garlic oil mixture.
- Press two mini pepperoni slices into the exposed cheese gap on each mummy for eyes.
- Bake for 10-12 minutes until the dough is golden brown and the cheese is bubbly.
- Let cool for 2-3 minutes before serving.
- Serve with warm pizza sauce for dipping.
Notes
For best results, use low-moisture mozzarella to avoid sogginess. If dough strips stick, sprinkle with more flour. If cheese leaks during baking, call them ‘zombie mummies’ and enjoy. Reheat leftovers in a 350°F oven for 5-7 minutes or in an air fryer at 350°F for 3-4 minutes.
Nutrition
- Serving Size: 1 mummy bite
- Calories: 150
- Sugar: 2
- Sodium: 375
- Fat: 7.5
- Saturated Fat: 3.5
- Carbohydrates: 15
- Fiber: 1
- Protein: 7.5
Keywords: Halloween, pizza bites, mummy, easy, quick, kid-friendly, party snack


