Love this? Save it for later!
Share the inspiration with your friends
My niece asked why I couldn’t just pipe the meringue into ghost shapes instead of making perfect circles. I started to explain why that wouldn’t work—then stopped. Honestly, I had no good reason. I’d been making meringue cookies for years, always fussing over uniform rounds, and here was a seven-year-old suggesting something way more fun.
I’ll admit, I felt a little silly. Here I was, the “experienced baker,” getting schooled by someone who thought Halloween cookies should actually look like Halloween. She was right, of course. Those little ghost shapes turned out better than anything I’d planned. The meringue held its shape perfectly, and the tiny chocolate chip eyes gave them so much personality. You know that feeling when you realize you’ve been overcomplicating something for no reason? That was this moment.
I mean, I’d spent years avoiding meringue because I thought it was too fussy. Then I figured out the trick—room temperature egg whites, a clean bowl, and patience. But I never thought to make them fun. That’s what kids do, right? They see the simple joy in things we adults turn into projects.
These Light & Airy Ghost Meringue Cookies are now my go-to Halloween treat. They’re crisp, sweet, and melt on your tongue like a sugary cloud. Plus, they’re naturally gluten-free and low in fat, which makes me feel a little better about the candy bowl situation. Maybe you’ve been there too—staring down a bag of Halloween candy and wishing for something a little lighter. These ghosts are your answer.
The best part? They’re surprisingly easy once you know a few tricks. And every time I make them, I think about that afternoon with my niece, her tiny hands covered in powdered sugar, telling me exactly how a ghost cookie should look. She was right. She was absolutely right.
Why You’ll Love This Recipe
These ghost meringue cookies are the kind of recipe that makes you look like a kitchen wizard without actually doing much work. I’ve tested this method at least a dozen times, tweaking temperatures and timing until every single ghost came out perfectly crisp and pure white. Here’s why they deserve a spot in your Halloween rotation:
- Naturally Gluten-Free & Low-Fat : No flour, no butter, no guilt. Just egg whites and sugar transforming into something magical. Perfect for friends with dietary restrictions.
- Incredibly Simple Ingredients : You probably have everything in your kitchen right now. Eggs, sugar, vanilla, and chocolate chips. That’s it. No fancy grocery trips required.
- Kid-Friendly Fun : Piping ghosts is way easier than rolling dough or cutting shapes. Kids can help with the chocolate chip eyes and watch them “puff up” in the oven. My niece still talks about “her” recipe.
- Make-Ahead Magic : These cookies stay fresh for weeks in an airtight container. You can make them days before your Halloween party without any stress.
- Guilt-Free Indulgence : Each ghost has about 15 calories. You can eat three or four without that heavy feeling you get from traditional cookies. Perfect for health-minded folks who still want something sweet.
What makes this recipe different from the dozens of meringue recipes out there? It’s the technique. I spent weeks perfecting the oven temperature so these ghosts stay brilliantly white instead of turning that sad tan color. The low-and-slow method gives you that light-as-air texture without any cracking. Plus, the ghost shape is genuinely foolproof—even if your piping is messy, they still look adorable.
This isn’t just another Halloween cookie. It’s the one that disappears first from the dessert table. The one people ask for the recipe. The one that makes you feel like you’re eating something indulgent without derailing your healthy habits. Honestly, that’s the best kind of recipe to have in your back pocket.
What Ingredients You Will Need
This recipe relies on a short list of pantry staples, but each one plays a crucial role in creating that perfect ghostly texture. I’ve tested substitutions so you don’t have to guess.
- 4 large egg whites , at room temperature (this is non-negotiable—cold eggs won’t whip properly. Separate them while cold, then let the whites sit out for 30 minutes)
- 1 cup (200g) granulated white sugar (regular white sugar works best. Avoid organic or raw sugar—the crystals are too large and won’t dissolve fully)
- 1/2 teaspoon cream of tartar (stabilizes the egg whites and helps them hold their shape. You can substitute 1 teaspoon of lemon juice or white vinegar in a pinch)
- 1 teaspoon vanilla extract (pure vanilla makes a difference here. I prefer Nielsen-Massey for its rich flavor, but any good brand works)
- 1/4 cup mini chocolate chips (for the ghost eyes. Go with mini chips—regular ones are too heavy and will sink into the meringue)
Ingredient Tips from My Kitchen :
Let me tell you about the time I tried using pasteurized egg whites from a carton. Disaster. They wouldn’t whip past soft peaks no matter how long I beat them. Fresh eggs are essential here. The proteins in fresh egg whites create a stronger structure that holds air better.
For the sugar, I’ve tested this with both superfine and regular granulated. Regular works perfectly as long as you give it enough time to dissolve. You can test this by rubbing a tiny bit of the meringue between your fingers—if it feels gritty, keep beating.
Cream of tartar is your insurance policy. It lowers the pH of the egg whites, which stabilizes the foam and prevents over-beating. I once skipped it because I was out, and my meringue deflated halfway through baking. Never again.
One more thing—make sure your bowl and whisk are completely clean and free of any grease. Even a tiny bit of oil or egg yolk will prevent your whites from whipping up. I wipe my bowl with a lemon wedge before starting, just to be safe.
Equipment Needed
You don’t need fancy equipment for these ghost cookies, but a few specific tools make the process much smoother.
- Electric mixer (stand mixer is ideal, but a hand mixer works fine. You’ll be beating for 8-10 minutes, so arm strength matters)
- Large glass or metal mixing bowl (plastic bowls can hold onto grease, even after washing. Glass or metal gives you cleaner results)
- Piping bag with a round tip (I use a Wilton #12 tip. A zip-top bag with the corner snipped off works in a pinch, but the shapes won’t be as defined)
- Baking sheets lined with parchment paper (parchment is essential—wax paper will stick, and silicone mats can cause spreading)
- Kitchen scale (optional but helpful for consistent results. I use mine to measure sugar precisely)
My first batch of meringues, I used a plastic bag with a tiny hole cut in the corner. They looked like sad little blobs. Investing in a proper piping bag and tip made such a difference. You can find a set for under $10 at any craft store.
Also, don’t skip the parchment paper. I learned this the hard way when my meringues refused to release from a silicone mat. Parchment gives them just enough grip to hold their shape while still peeling off cleanly.
Preparation Method
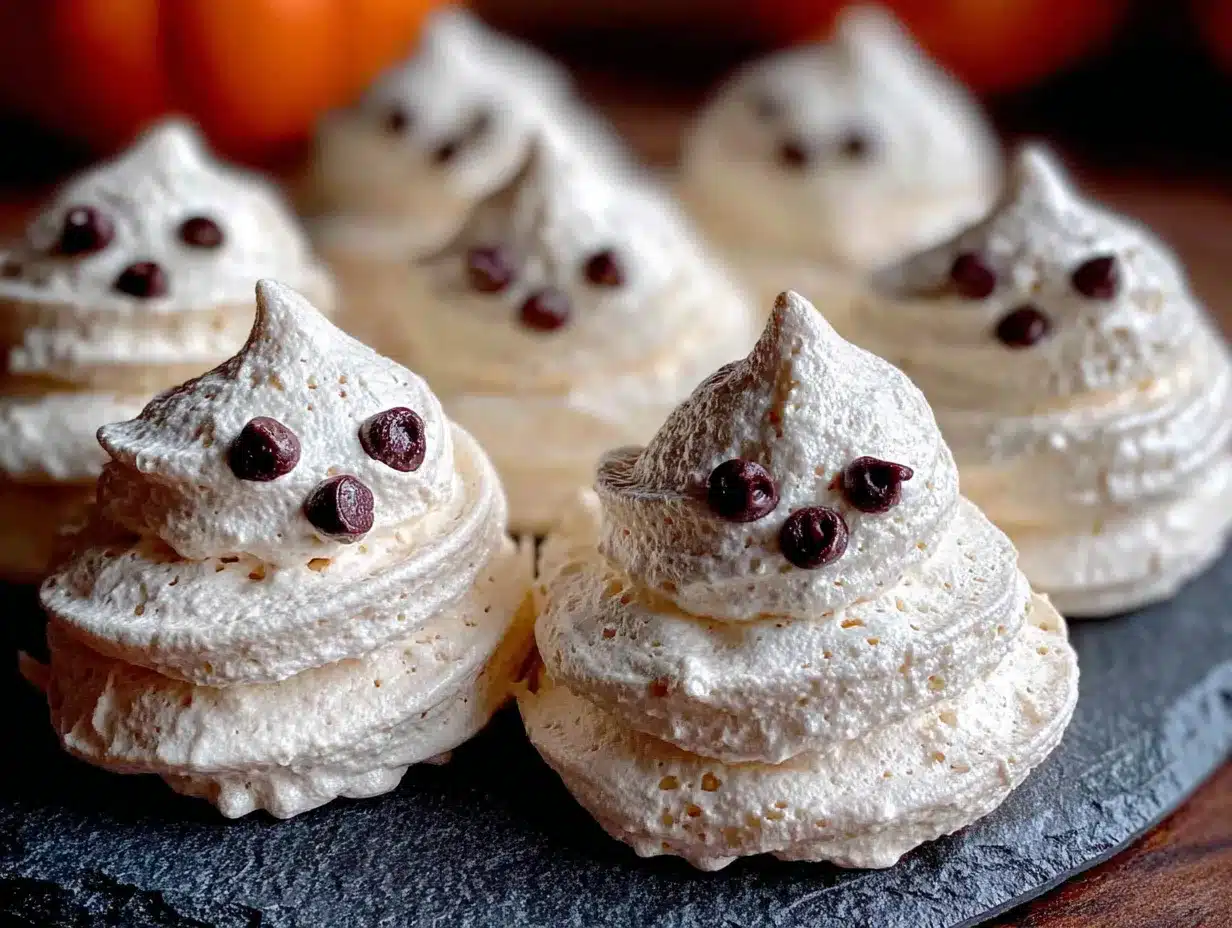
Let me walk you through this step by step. I’ve included all the little details I wish someone had told me when I first started making meringues.
- Preheat your oven to 200°F (93°C) . Yes, this seems ridiculously low. That’s the point. We’re drying the meringues, not baking them. Line two baking sheets with parchment paper and set them aside.
- Separate your eggs while they’re cold , then let the whites come to room temperature for 30 minutes. This is crucial—cold egg whites won’t whip to their full volume. I usually separate them first thing, then prep my other ingredients while they warm up.
- Add the cream of tartar to the egg whites and begin beating on medium speed. After about 2 minutes, you’ll see foamy bubbles forming. The mixture will look like soap suds at this point—that’s normal.
- Gradually add the sugar , one tablespoon at a time, while continuing to beat. I know it’s tempting to dump it all in at once, but slow and steady gives you a more stable meringue. Each addition should be fully incorporated before you add the next.
- Increase speed to high and beat for 6-8 minutes . You’re looking for stiff, glossy peaks that hold their shape when you lift the beater. The meringue should be thick enough that it doesn’t slide around in the bowl. Here’s my test: turn the bowl upside down. If nothing moves, you’re done.
- Add the vanilla extract and beat for 30 seconds more. You’ll see the meringue become even glossier. The vanilla should be fully incorporated but over-mixing at this point can deflate your whites.
- Transfer the meringue to your piping bag fitted with a round tip. If you’re using a zip-top bag, fill it halfway and snip off a 1/2-inch corner. Work quickly—meringue can start to separate if it sits too long.
- Pipe ghost shapes onto the prepared baking sheets . Hold the bag straight up and down, about 1/2 inch above the parchment. Squeeze gently to create a round base, then pull straight up while reducing pressure to form a tapered top. Leave about 1 inch between each ghost—they don’t spread much, but you want air circulation.
- Add the chocolate chip eyes while the meringue is still wet. Gently press two mini chips into each ghost. Don’t push too hard or you’ll deflate the shape. If the chips fall off during baking, just press them back on after they cool.
- Bake for 60-75 minutes , rotating the pans halfway through. The meringues are done when they lift easily off the parchment and sound hollow when tapped. They should be dry to the touch but still pure white—if they start turning golden, your oven is too hot.
- Turn off the oven and leave the ghosts inside to cool completely , about 2 hours. This slow cooling prevents cracking. I usually make these before bed and let them sit in the oven overnight.
One warning: don’t open the oven door during the first 45 minutes of baking. The sudden temperature change can cause your ghosts to crack. I know it’s tempting to peek, but trust the process.
Cooking Tips & Techniques
After making these ghosts more times than I can count, I’ve collected a few tricks that make all the difference.
Humidity is your enemy. Meringue is basically sugar foam, and sugar attracts moisture. Don’t make these on a rainy or humid day—they’ll turn sticky and never crisp up properly. I learned this the hard way during a summer thunderstorm. Wait for a dry day, or crank up your air conditioning to reduce humidity in your kitchen.
Room temperature eggs really matter. I know I’ve said this already, but let me explain why. Cold egg whites have tighter protein structures that don’t expand as much when beaten. Room temperature whites can hold up to eight times their volume in air bubbles. That’s the difference between flat cookies and puffy ghosts.
Don’t over-beat. There’s a fine line between stiff peaks and over-beaten meringue. If your mixture starts looking grainy or separates into liquid and foam, you’ve gone too far. The meringue should be smooth, glossy, and hold a firm peak without being dry.
Pipe with confidence. Hesitation leads to lumpy ghosts. Hold the piping bag steady and squeeze with consistent pressure. If your first few look wonky, that’s fine—they’ll still taste delicious. My first batch looked like deformed snowmen, and they disappeared just as fast.
Storage is everything. Once cooled, these ghosts need to be stored in an airtight container at room temperature. Any moisture will turn them chewy. I add a silica gel packet (the kind that comes in shoe boxes) to my container to keep them crisp. They’ll stay fresh for up to two weeks this way.
Variations & Adaptations
One of the best things about this recipe is how easy it is to customize. Here are some variations I’ve tried and loved:
Chocolate Ghosts : Swap 2 tablespoons of sugar for 2 tablespoons of unsweetened cocoa powder. Sift the cocoa powder with the sugar to avoid lumps. The ghosts turn a pale chocolate color—perfect for “chocolate ghost” vibes.
Peppermint Specters : Replace the vanilla extract with 1/2 teaspoon peppermint extract. Crush a candy cane and sprinkle the pieces on top before baking. These are amazing for Christmas or winter parties.
Vegan Meringue Ghosts : Use aquafaba (the liquid from a can of chickpeas) instead of egg whites. 3 tablespoons of aquafaba equals one egg white. Add an extra 1/4 teaspoon cream of tartar for stability. The texture is slightly less crisp but still delicious.
Colorful Spirits : Add a drop of gel food coloring to half the meringue before piping. Swirl it gently with a toothpick for a marbled effect. Purple or orange work great for Halloween.
Spiced Ghosts : Add 1/2 teaspoon pumpkin pie spice to the sugar before beating. The cinnamon and nutmeg give a warm fall flavor that pairs beautifully with the sweet meringue.
My personal favorite variation? The peppermint version. I made them for a Christmas party last year, and they vanished before the sugar cookies. Something about the cool mint and airy texture just works.
Serving & Storage Suggestions
These ghost meringues are best served at room temperature, straight from the container. They’re light enough to eat by the handful, which is exactly what happens at my Halloween parties.
For presentation, arrange them on a white platter or cake stand. The contrast between the white ghosts and a dark surface makes them pop. Add a few fake spiderwebs or plastic spiders around the platter for a spooky touch. I’ve also threaded them onto strings with a needle to make edible garlands—just be gentle so they don’t crack.
Storage is straightforward: keep them in an airtight container at room temperature. Do not refrigerate—the moisture in the fridge will ruin their texture. I use a glass jar with a tight-fitting lid, layered with parchment paper between each row. They’ll stay crisp for up to two weeks.
You can freeze these ghosts too. Place them in a single layer in a freezer-safe container, separating layers with parchment. Freeze for up to three months. Thaw at room temperature for 30 minutes before serving. They won’t be quite as crisp as fresh, but they’re still delicious.
One thing I love about these cookies is that their flavor actually improves after a day or two. The vanilla mellows out, and the texture becomes even more delicate. If you can resist eating them immediately, they’re even better the next day.
Nutritional Information & Benefits
Per ghost cookie (based on 24 cookies):
- Calories: 35
- Fat: 0g
- Carbohydrates: 8g
- Sugar: 8g
- Protein: 1g
- Sodium: 10mg
These cookies are naturally fat-free and gluten-free, making them a great option for people with dietary restrictions. The main ingredient is egg white protein, which is a complete protein containing all essential amino acids. Each ghost gives you a small protein boost—not enough to call it a health food, but better than most Halloween treats.
The sugar content is the main thing to watch. While these are lower in calories than traditional cookies, they’re still a sweet treat. I find that their light texture makes them more satisfying than dense cookies—I’m happy with three or four instead of a handful of chocolate chip cookies.
For anyone watching their sugar intake, you can reduce the sugar to 3/4 cup, but the texture will be slightly less crisp. I’ve tested this and found the difference minimal. The cookies just won’t hold their shape quite as well.
Conclusion
These Light & Airy Ghost Meringue Cookies have become my signature Halloween treat, and for good reason. They’re impossibly simple, genuinely fun to make, and somehow manage to feel indulgent without weighing you down. Every time I bring them to a party, someone asks for the recipe.
What I love most is how they bring people together. Kids love piping the shapes and adding the eyes. Adults appreciate that they’re light enough to eat without guilt. And everyone gets a kick out of those tiny chocolate chip faces staring up from the platter.
I hope you’ll try making these ghosts your own. Add different extracts, experiment with colors, or just enjoy them exactly as written. The beauty of this recipe is its flexibility—it works with whatever creative spin you want to add.
If you make these, I’d love to hear about it. Drop a comment below and tell me how your ghosts turned out. Did the kids help? Did you try a fun variation? Share your photos too—I always love seeing your creations. And if you’re looking for more Halloween treats that won’t derail your healthy habits, check out my recipe for spooky pumpkin protein balls—they’re another crowd-pleaser that happens to be good for you.
Happy Halloween, and happy baking!
Frequently Asked Questions
Can I make these ghost meringue cookies without a piping bag?
Absolutely. Spoon the meringue into a zip-top bag, snip off a small corner, and pipe away. For a totally no-fuss approach, use two spoons to drop dollops of meringue onto the parchment. They won’t look as ghost-like, but they’ll taste just as good.
Why did my meringue cookies turn brown?
Your oven was too hot. Meringues need low, slow heat to dry out without browning. Check your oven temperature with an oven thermometer—many ovens run hotter than the dial shows. If they’re browning, lower the temperature by 25 degrees next time.
Can I use liquid egg whites from a carton?
I don’t recommend it. Carton egg whites are pasteurized at high temperatures, which damages the proteins that create stable foam. Fresh egg whites give you much better volume and texture. Trust me on this one—I’ve tried both ways.
How do I know when the meringue is fully baked?
Lift one off the parchment. If it releases easily and sounds hollow when tapped, it’s done. The inside should be dry and crisp, not chewy or sticky. If in doubt, leave them in the oven for an extra 10 minutes—they’re very forgiving at low temperatures.
Can I double this recipe?
Yes, but don’t try to beat more than 4 egg whites at a time unless you have a commercial mixer. The volume of meringue is surprisingly large. Make two separate batches if you need more, or use a stand mixer with the whisk attachment for the full double batch.
Pin This Recipe!
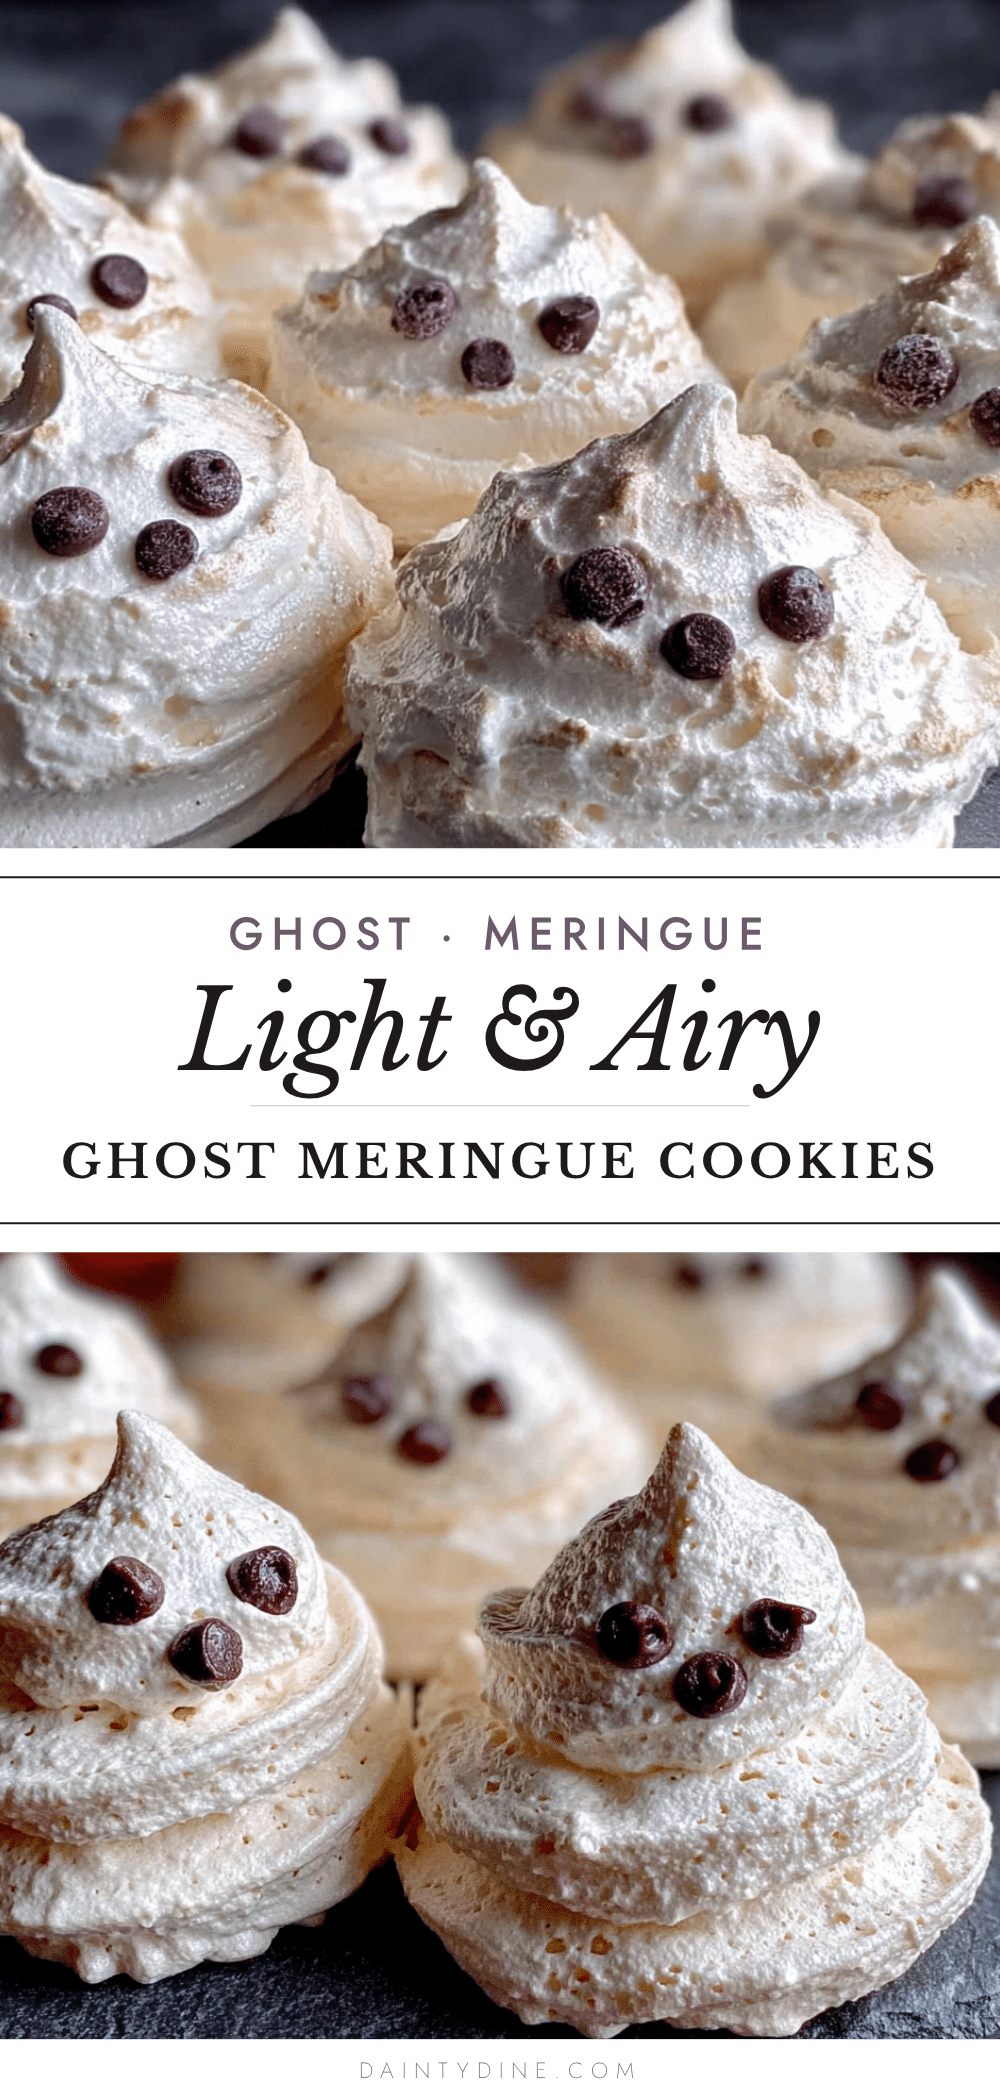
Light & Airy Ghost Meringue Cookies Easy Halloween Treat
These Light & Airy Ghost Meringue Cookies are crisp, sweet, and melt on your tongue like a sugary cloud. They’re naturally gluten-free and low in fat, making them a perfect Halloween treat that’s fun to make with kids.
- Prep Time: 30 minutes
- Cook Time: 60-75 minutes
- Total Time: 2 hours 30 minutes to 2 hours 45 minutes
- Yield: 24 cookies 1x
- Category: Dessert
- Cuisine: American
Ingredients
- 4 large egg whites, at room temperature
- 1 cup (200g) granulated white sugar
- 1/2 teaspoon cream of tartar
- 1 teaspoon vanilla extract
- 1/4 cup mini chocolate chips
Instructions
- Preheat your oven to 200°F (93°C). Line two baking sheets with parchment paper and set them aside.
- Separate your eggs while they’re cold, then let the whites come to room temperature for 30 minutes.
- Add the cream of tartar to the egg whites and begin beating on medium speed. After about 2 minutes, you’ll see foamy bubbles forming.
- Gradually add the sugar, one tablespoon at a time, while continuing to beat.
- Increase speed to high and beat for 6-8 minutes until stiff, glossy peaks form. The meringue should be thick enough that it doesn’t slide around in the bowl.
- Add the vanilla extract and beat for 30 seconds more.
- Transfer the meringue to your piping bag fitted with a round tip.
- Pipe ghost shapes onto the prepared baking sheets. Hold the bag straight up and down, about 1/2 inch above the parchment. Squeeze gently to create a round base, then pull straight up while reducing pressure to form a tapered top. Leave about 1 inch between each ghost.
- Add the chocolate chip eyes while the meringue is still wet. Gently press two mini chips into each ghost.
- Bake for 60-75 minutes, rotating the pans halfway through. The meringues are done when they lift easily off the parchment and sound hollow when tapped.
- Turn off the oven and leave the ghosts inside to cool completely, about 2 hours.
Notes
Don’t open the oven door during the first 45 minutes of baking to prevent cracking. Store in an airtight container at room temperature for up to two weeks. Avoid making on humid days. For best results, use fresh egg whites at room temperature.
Nutrition
- Serving Size: 1 ghost cookie
- Calories: 35
- Sugar: 8
- Sodium: 10
- Carbohydrates: 8
- Protein: 1
Keywords: ghost meringue cookies, Halloween cookies, gluten-free cookies, low-fat cookies, meringue cookies, easy Halloween treat, kid-friendly cookies


